By Dovydas Kersys · Chapter 38 of 40 in Hydraulic Troubleshooting.
Before you begin: Hydraulic equipment can contain lethal stored energy. Only trained and authorized personnel should perform hydraulic work. Isolate energy, support loads, verify the pressure state, use pressure-rated instruments and follow site-specific lockout/tagout procedures. The diagrams are simplified training illustrations; use the actual machine schematic and manufacturer instructions.
The following cases show how the measurement-first method works under production pressure. The point is not to memorize a symptom-to-part answer; it is to see how each observation eliminates possible causes.
In practice, the fastest diagnosis comes from deciding what the component is supposed to control and then measuring the variable on both sides of that component. Pressure tells you about load and restriction; flow tells you about speed; temperature tells you where power is being lost; leakage tells you whether clearances or seals are allowing oil to bypass the intended path.
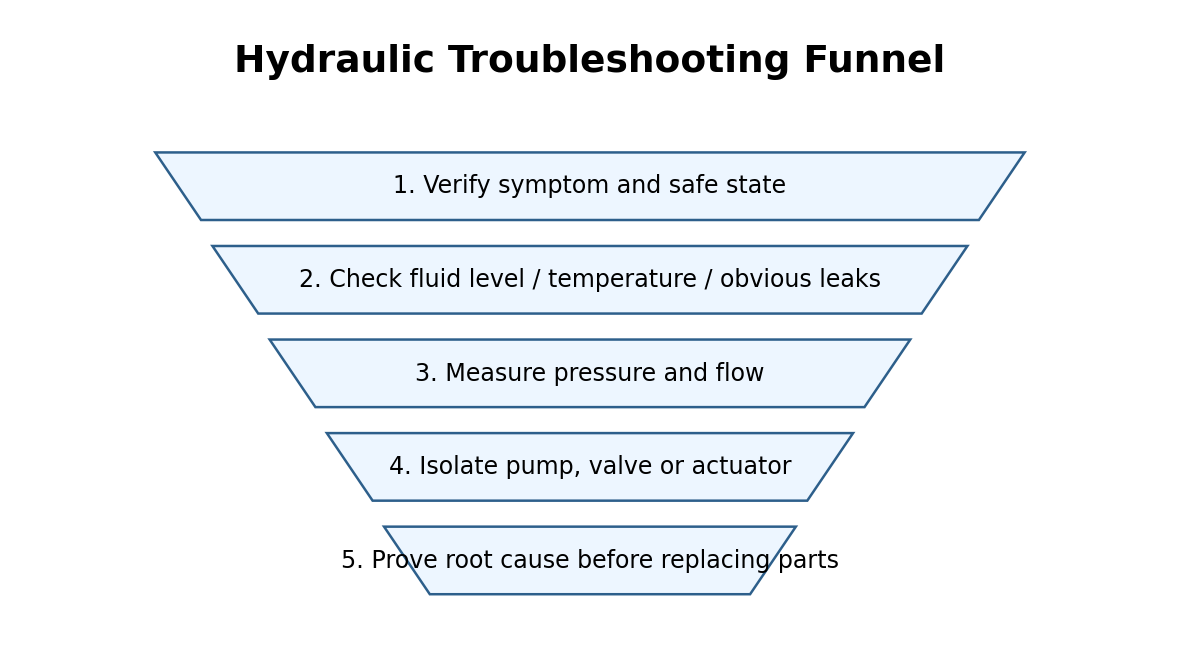
Figure 38. Simplified diagnostic view for 38. Ten Realistic Troubleshooting Case Studies.
What the technician may observe
- slow press after warm-up
- vertical cylinder creeps
- pump suddenly noisy after oil change
- one actuator weak but others normal
- oil overheats during machine idle
Diagnostic sequence
- For each case, write the symptom in one sentence and list what changed recently. Compare the reading with a known-good baseline or the machine specification rather than relying on a generic value.
- Choose the first two measurements that separate likely causes. Record the result before changing the next variable so the test actually narrows the fault.
- Predict what each possible result would mean before taking the measurement. Compare the reading with a known-good baseline or the machine specification rather than relying on a generic value.
- Isolate the fault to supply, control, actuator or load. Record the result before changing the next variable so the test actually narrows the fault.
- Repair the proven cause and restore original settings. Compare the reading with a known-good baseline or the machine specification rather than relying on a generic value.
- Verify the fix under the same operating conditions that produced the failure. Record the result before changing the next variable so the test actually narrows the fault.
How to interpret the measurements
Begin by asking whether the symptom affects the whole machine or only this function. If other functions sharing the same supply remain normal, a common pump or reservoir fault becomes less likely and the local valve, actuator, plumbing and mechanical load deserve more attention.
Next, compare pressure upstream and downstream while oil is actually flowing. A large pressure difference across a component means that component or passage is consuming hydraulic energy. If flow is low everywhere, investigate pump delivery, inlet conditions, speed and major internal leakage before blaming a local valve.
Finally, repeat the test at the condition that creates the complaint: hot oil, full load, a particular direction, low speed or rapid cycling. Hydraulic clearances, viscosity, pilot pressures and valve forces change with operating condition, so a static test may look normal while the production fault remains.
Corrective actions after the cause is proven
- Use the case-study logic as a template for real work orders.
- Capture before-and-after readings.
- Do not treat a temporary improvement as proof of root cause.
- Feed the confirmed cause back into preventive maintenance.
Common mistakes
- Adjusting the relief or compensator before recording the original setting and proving that the setting is wrong.
- Replacing a component because it is hot, even though the heat may be arriving from an upstream restriction or continuous bypass flow.
- Calling a problem “low pressure” when the actual complaint is low flow or excessive mechanical load.
- Testing only with cold oil when the production fault appears after the system reaches operating temperature.
Field rule: For 38. ten realistic troubleshooting case studies, do not replace a component until one measurement or isolation test shows how it fails to perform its intended function.
Symptom-to-next-test table
| Observed condition | First useful test |
|---|---|
| Slow press after warm-up | Measure delivered flow and work-port pressure during motion. |
| Vertical cylinder creeps | Secure the load, then isolate valve leakage from actuator leakage. |
| Pump suddenly noisy after oil change | Measure the controlled variable before and after the suspected component. |
| One actuator weak but others normal | Measure pressure at pump and actuator under the actual load. |
Field practice
Before leaving the machine, write down three numbers that would let another technician judge whether the repair truly restored normal operation. Good choices are usually operating temperature, a pressure at a defined machine state, and either flow or cycle time. This creates the baseline that makes the next fault faster to diagnose.
Detailed Case Studies
These cases expand the troubleshooting method into realistic maintenance situations. The machine details are generic so the logic can be transferred to presses, lifting systems, clamps, mobile power units, test rigs and industrial production equipment.
Case 1 – Press slows down only after 45 minutes
Scenario. The press is normal cold. Once the reservoir reaches normal operating temperature, advance speed falls and the pump outlet pressure rises close to relief during what used to be a low-pressure movement.
Measurement path. Measure flow at pump outlet hot and compare pressure before/after the directional and flow-control section. If pump flow has fallen at pressure, internal pump leakage is likely. If pump flow is good but pressure drops across one valve, the restriction is downstream.
Lesson. A worn pump is confirmed by hot flow loss under pressure. The repair is pump replacement plus contamination/root-cause review, not a higher relief setting.
Technician record: symptom ______ oil temperature ______ pump pressure ______ work-port pressure ______ flow/cycle time ______ confirmed root cause ____________________.
Case 2 – Vertical cylinder creeps downward when stopped
Scenario. The cylinder supports a heavy platen. It holds for several minutes and then drops slowly, even though the directional valve is centered.
Measurement path. Secure the platen mechanically. Monitor both cylinder port pressures and isolate the cylinder using the approved load-holding test. If the cylinder holds when isolated, leakage is in the valve/check circuit. If it still moves, suspect piston-seal bypass or external leakage.
Lesson. The case demonstrates why “cylinder drift = bad seals” is not a safe assumption.
Technician record: symptom ______ oil temperature ______ pump pressure ______ work-port pressure ______ flow/cycle time ______ confirmed root cause ____________________.
Case 3 – Pump growls after an oil change
Scenario. Immediately after maintenance, the fixed-displacement pump makes a gravel-like sound. The oil looks clear and the system still reaches pressure.
Measurement path. Check actual oil grade, cold viscosity, suction valve position, strainer condition and suction hose collapse. Measure inlet vacuum. Then inspect level and return aeration.
Lesson. A wrong high-viscosity oil or partly closed suction valve can cavitate a healthy pump and damage it quickly.
Technician record: symptom ______ oil temperature ______ pump pressure ______ work-port pressure ______ flow/cycle time ______ confirmed root cause ____________________.
Case 4 – Only one clamp is weak
Scenario. Three clamps share the same pump. Two reach target force; one stalls at a lower pressure.
Measurement path. Because common pump supply is proven by the other clamps, measure pressure at the weak clamp valve outlet and cylinder ports. Check reducing valve setting, local relief path and cylinder leakage.
Lesson. The comparison to healthy functions prevents an unnecessary pump change.
Technician record: symptom ______ oil temperature ______ pump pressure ______ work-port pressure ______ flow/cycle time ______ confirmed root cause ____________________.
Case 5 – Hydraulic unit overheats while production is stopped
Scenario. The power unit remains on between cycles. No actuators are moving, yet the reservoir temperature steadily rises and motor current remains high.
Measurement path. Measure standby pump pressure and check whether flow is crossing the main relief or another throttling path. On variable pumps, verify compensator or load-sense standby behavior.
Lesson. Continuous high-pressure bypass flow is converted almost entirely into heat.
Technician record: symptom ______ oil temperature ______ pump pressure ______ work-port pressure ______ flow/cycle time ______ confirmed root cause ____________________.
Case 6 – Cylinder retracts normally but extends slowly
Scenario. Retraction time is normal. Extension is slow and the cap-end pressure is higher than historical baseline.
Measurement path. Measure pressure before and after the extension path flow-control and directional valve. Check rod-side return backpressure because a restricted return can slow extension even when cap-end supply is healthy.
Lesson. Direction-specific symptoms strongly favor valve, line or port restrictions over a common pump fault.
Technician record: symptom ______ oil temperature ______ pump pressure ______ work-port pressure ______ flow/cycle time ______ confirmed root cause ____________________.
Case 7 – New relief valve will not reach the old setting
Scenario. A relief cartridge was replaced after contamination. The adjuster reaches the end of travel but system pressure still stays low.
Measurement path. First confirm pump flow at pressure and check for another open path to tank. Verify cartridge cavity, seals, orientation and pilot/drain routing.
Lesson. A pressure control cannot create pressure if flow escapes somewhere else.
Technician record: symptom ______ oil temperature ______ pump pressure ______ work-port pressure ______ flow/cycle time ______ confirmed root cause ____________________.
Case 8 – Proportional axis hunts near position
Scenario. A hydraulic axis oscillates around its target at low speed. The PLC command appears stable.
Measurement path. Trend command, position feedback, valve current and work-port pressures on the same time base. A stable command with noisy feedback suggests transducer/wiring; stable electrical signals with irregular pressure suggests hydraulic sticking or contamination.
Lesson. Synchronizing electrical and hydraulic data prevents arguments between controls and mechanical teams.
Technician record: symptom ______ oil temperature ______ pump pressure ______ work-port pressure ______ flow/cycle time ______ confirmed root cause ____________________.
Case 9 – Filter indicator trips every cold morning
Scenario. The return filter indicator is normal in the afternoon but shows bypass during the first minutes of a winter shift.
Measurement path. Measure oil temperature and differential pressure at startup. Verify element rating and cold viscosity. Check whether return surge flow is unusually high during initial cycles.
Lesson. The solution may be warm-up strategy or filter sizing, not simply more frequent element changes.
Technician record: symptom ______ oil temperature ______ pump pressure ______ work-port pressure ______ flow/cycle time ______ confirmed root cause ____________________.
Case 10 – Hose replacement creates a new slow-motion fault
Scenario. A failed hose was replaced with one that fits the same ports. Immediately afterward, the actuator is slower and the new hose gets noticeably warmer.
Measurement path. Compare hose internal diameter, fitting bore, quick coupler condition and bend radius with the original specification. Measure pressure at both ends while the actuator moves.
Lesson. A hose can be physically compatible while hydraulically too restrictive.
Technician record: symptom ______ oil temperature ______ pump pressure ______ work-port pressure ______ flow/cycle time ______ confirmed root cause ____________________.
Continue the series
- Previous chapter: Hydraulic Preventive Maintenance That Actually Prevents Failures
- Next chapter: Hydraulic Troubleshooting Symptom-to-Measurement Guide
- Browse all Hydraulic Troubleshooting chapters
Adapted from Hydraulic Troubleshooting for Maintenance Technicians, by Dovydas Kersys. © 2026 Dovydas Kersys. Featured cover image is an AI-generated editorial illustration.