An angle measuring sensor measures the rotational position of a shaft, valve, actuator, lever, steering mechanism, flap, or machine part.
In automation, angle sensors are used for:
Valve position feedback
Rotary actuator position
Damper position
Machine arm angle
Steering angle
Lever position
Pedal position
Shaft position
Rotary mechanism feedback
Mobile machinery position control
PLC and controller feedback
When an angle sensor gives a wrong value, the problem is not always the sensor itself.
The fault can come from:
Wrong sensor supply voltage
Wrong analog output scaling
Wrong PLC scaling
Wrong angle range
Magnet misalignment
Air gap too large
Magnet installed backwards
Weak or missing magnet
Loose mounting bracket
Shaft wobble
Mechanical backlash
External magnetic field
Cable damage
Loose connector
Grounding problem
Electrical noise
Wrong rotation direction
Wrong zero/teach setting
Wrong digital mapping
Sensor damaged by vibration, water, or impact
The best way to diagnose angle sensor problems is to check the sensor, magnet, wiring, PLC scaling, and mechanical installation step by step.
Important Safety Note
Angle sensors are often installed on moving machine parts.
Before troubleshooting:
Follow lockout/tagout procedures.
Do not place hands near moving shafts, valves, actuators, or linkages.
Make sure stored mechanical energy is released.
Be careful with hydraulic, pneumatic, or spring-loaded mechanisms.
Do not force the shaft past its mechanical stop.
Do not rotate valves or actuators into unsafe process positions.
Do not use an insulation tester on connected sensor electronics or PLC inputs.
Angle sensor faults can cause wrong valve position feedback, incorrect actuator movement, or unsafe machine behavior, so test carefully.
First: Identify the Angle Sensor Type
Before measuring anything, identify what type of angle sensor you have.
Common angle sensor types include:
Magnetic angle sensor
Potentiometric angle sensor
Optical encoder
Magnetic encoder
Inductive angle sensor
Resolver
Rotary position transmitter
Smart angle sensor with IO-Link or CAN
This article focuses mainly on magnetic angle measuring sensors, but many checks also apply to other rotary position sensors.
Common Angle Sensor Output Types
Angle sensors can use different outputs.
Common outputs include:
4–20 mA
0–10V
0.5–4.5V
PWM
PNP switching output
NPN switching output
Relay output
IO-Link
CANopen
Modbus
SSI
Incremental A/B pulses
Sine/cosine signals
The troubleshooting method depends on the output.
A 4–20 mA angle sensor is checked differently from a digital encoder or PWM sensor.
Common Angle Sensor Fault Symptoms
Common symptoms include:
No angle reading
Angle stuck at 0°
Angle stuck at maximum
Angle jumps randomly
Wrong angle value
Angle value reversed
Output does not change when shaft rotates
PLC value does not match sensor output
Sensor display correct but PLC wrong
4–20 mA stuck at 4 mA
4–20 mA stuck at 20 mA
0–10V stuck at 0V or 10V
Output below 4 mA or above 20 mA
Angle changes when cable is moved
Angle changes when motor starts
Reading drifts over time
Sensor works only in part of the range
Angle is correct at zero but wrong at full scale
Sensor loses position after replacement
Digital communication fault
Wrong valve open/closed feedback
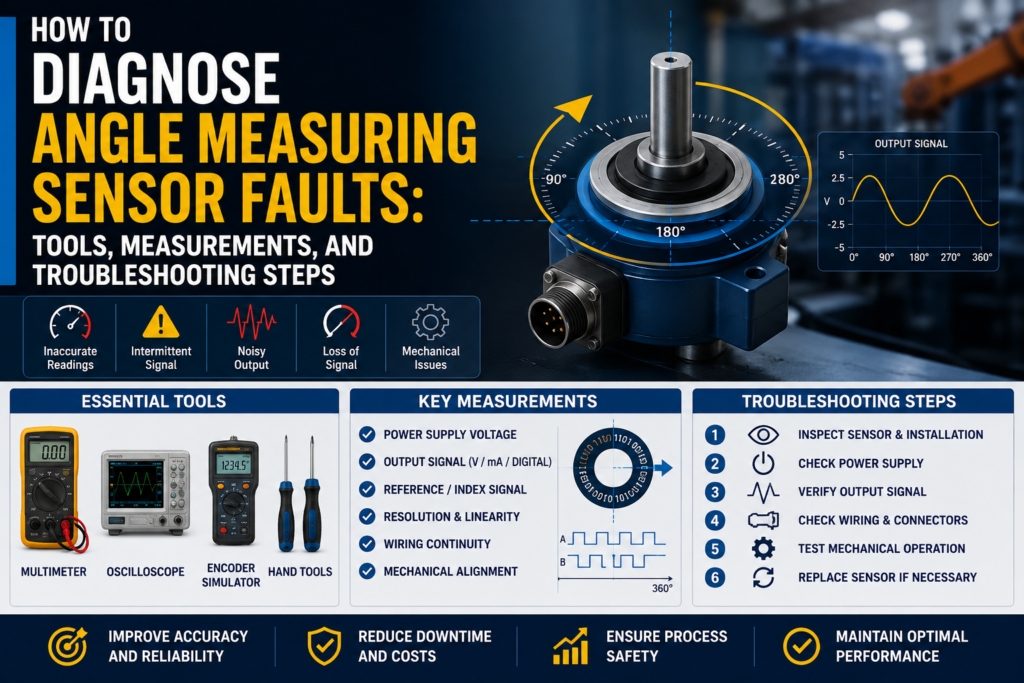
Tools Needed for Angle Sensor Troubleshooting
1. Digital Multimeter
A multimeter is the first tool to use.
Use it to check:
24V DC supply
0–10V output
0.5–4.5V output
4–20 mA output
PNP output
NPN output
Relay contacts
Cable continuity
Grounding problems
Loose wires
Short circuits
A multimeter is enough for many basic angle sensor faults.
2. Loop Calibrator / Process Meter
A loop calibrator is useful for 4–20 mA angle sensors.
Use it to:
Measure sensor output current
Simulate 4–20 mA into the PLC
Check PLC scaling
Check HMI scaling
Check alarms and limits
Prove whether the fault is sensor-side or PLC-side
If the sensor output is correct but the PLC value is wrong, use a loop calibrator.
3. Oscilloscope
An oscilloscope is useful when the signal is noisy or fast.
Use it to check:
PWM duty cycle
Output ripple
Electrical noise
Voltage spikes
Encoder pulses
Sine/cosine signals
Signal dropouts
VFD interference
Grounding problems
This is especially useful for PWM sensors, encoders, and unstable analog signals.
4. Protractor / Digital Angle Gauge
A reference angle tool is very useful.
Use it to compare:
Real mechanical angle
Sensor display angle
PLC angle value
HMI angle value
Useful tools include:
Digital angle gauge
Protractor
Rotary scale
Mechanical angle fixture
Valve position indicator
Dial scale on actuator
Without a reference angle, it is difficult to prove whether the sensor is accurate.
5. Feeler Gauge / Caliper
For magnetic angle sensors, air gap is important.
Use a feeler gauge or caliper to check:
Distance between magnet and sensor
Sensor mounting position
Magnet position
Shaft movement
Bracket alignment
The correct air gap depends on the sensor and magnet design, so always check the datasheet.
6. Gauss Meter / Magnetic Field Meter
This is not always needed, but it can be useful.
Use it to check:
Magnet presence
Magnet strength
Magnet polarity
External magnetic interference
Magnetic field near the sensor
If a magnetic angle sensor has a missing, weak, or wrong magnet, the output may be incorrect.
7. PLC Software
Use PLC software to check:
Raw analog input value
Scaled angle value
Engineering units
Input channel configuration
HMI tag scaling
Digital input status
Communication mapping
IO-Link process data
CANopen object mapping
Alarm logic
Rotation direction logic
Many angle sensor problems are actually PLC scaling or mapping problems.
8. Sensor Configuration Tool
Some angle sensors are configurable.
Configuration may be done by:
Teach button
Magnet teach procedure
IO-Link
CANopen configuration
USB adapter
Display menu
Software tool
Check:
Angle range
Zero position
Span
Rotation direction
Output range
Damping/filter
Switching points
Fail-safe behavior
Communication address
Digital process data mapping
9. Insulation Tester
Use carefully.
An insulation tester can help find:
Damaged cable insulation
Water in connector
Short to ground
Moisture in junction box
Cable leakage
Do not use it on connected sensor electronics or PLC inputs.
Disconnect the sensor first and follow the manual.
Step 1: Check the Real Mechanical Angle
Before blaming the sensor, check the real machine position.
Ask:
Is the shaft actually rotating?
Is the valve actually moving?
Is the actuator coupled to the sensor shaft?
Is the magnet rotating with the shaft?
Is there mechanical backlash?
Is the coupling loose?
Is the bracket moving?
Is the machine part hitting a mechanical stop?
Is the sensor measuring the correct shaft?
A sensor can only measure the movement it is mechanically connected to.
If the magnet or shaft does not move correctly, the sensor output will not be correct.
Step 2: Check Local Display or Status LED
If the sensor has a display or LED, check it first.
Check:
Power LED
Output LED
Error LED
Communication LED
Local angle value
Magnet warning
Teach status
Range error
Overrange or underrange
Digital communication status
If Sensor Display Is Correct but PLC Is Wrong
The problem is likely:
Wiring
Analog input
PLC scaling
HMI scaling
Wrong units
Wrong channel
Wrong digital mapping
If Sensor Display Is Wrong Too
The problem may be:
Magnet alignment
Air gap
Sensor setup
Mechanical coupling
Sensor damage
Power supply
Wrong range
External magnetic field
Step 3: Check Power Supply Voltage
Many industrial angle sensors use 24V DC.
Measure voltage directly at the sensor connector or terminals.
Good 24V DC Reading
For many industrial sensors:
20.4V DC to 28.8V DC
This is 24V ±20%.
Some sensors use 5V DC, 10V DC, or other supply ranges, so always check the datasheet.
Bad Readings
0V
Wrong polarity
Voltage below allowed range
Unstable voltage
Voltage drops when output changes
High AC ripple
Loose 0V/common wire
Power supply overloaded
Measure the voltage while the sensor is connected.
A weak supply can look correct with no load but fail when connected.
Step 4: Check 4–20 mA Output
Many industrial angle sensors output 4–20 mA.
Example:
0–360° = 4–20 mA
| Angle | Expected Current |
|---|---|
| 0° | 4 mA |
| 90° | 8 mA |
| 180° | 12 mA |
| 270° | 16 mA |
| 360° | 20 mA |
Another common example:
0–90° valve position = 4–20 mA
| Valve Angle | Expected Current |
|---|---|
| 0° | 4 mA |
| 22.5° | 8 mA |
| 45° | 12 mA |
| 67.5° | 16 mA |
| 90° | 20 mA |
Good 4–20 mA Measurements
Around 4 mA at lower angle limit
Around 12 mA at middle of range
Around 20 mA at upper angle limit
Current changes smoothly when shaft rotates
Measured current matches sensor display and configured range
Bad 4–20 mA Measurements
| Reading | Possible Problem |
|---|---|
| 0 mA | No power, broken loop, wrong wiring |
| Below 3.6 mA | Fault alarm on many devices |
| 4 mA all the time | Sensor at zero, output stuck, magnet not moving |
| 20 mA all the time | Sensor at full scale, output saturated, wrong range |
| Above 21 mA | Fault alarm or overrange |
| Jumping current | Noise, loose cable, magnet wobble |
| Correct display but wrong mA | Output configuration problem |
| Correct mA but wrong PLC value | PLC scaling problem |
Alarm current depends on sensor configuration.
Step 5: Check 0–10V Output
Some angle sensors output 0–10V.
Example:
0–360° = 0–10V
| Angle | Expected Voltage |
|---|---|
| 0° | 0V |
| 90° | 2.5V |
| 180° | 5V |
| 270° | 7.5V |
| 360° | 10V |
For a 0–90° valve sensor:
| Angle | Expected Voltage |
|---|---|
| 0° | 0V |
| 22.5° | 2.5V |
| 45° | 5V |
| 67.5° | 7.5V |
| 90° | 10V |
Good 0–10V Measurements
0V near lower limit
5V near middle of range
10V near upper limit
Voltage changes smoothly with rotation
PLC value matches measured voltage
Bad 0–10V Measurements
0V all the time
10V all the time
Voltage unstable
Voltage drops when connected to PLC
Voltage changes when cable is touched
Voltage noisy when motors run
Correct voltage but wrong PLC value
Voltage outputs are more sensitive to noise and cable length than 4–20 mA outputs.
Step 6: Check 0.5–4.5V Output
Some sensors, especially mobile or vehicle-style sensors, use 0.5–4.5V output.
Example:
0–360° = 0.5–4.5V
| Angle | Expected Voltage |
|---|---|
| 0° | 0.5V |
| 90° | 1.5V |
| 180° | 2.5V |
| 270° | 3.5V |
| 360° | 4.5V |
This output leaves space below 0.5V and above 4.5V for fault detection.
Good
Around 0.5V at minimum angle
Around 2.5V at middle angle
Around 4.5V at maximum angle
Smooth change with rotation
Bad
0V output
5V output
Output stuck at 0.5V
Output stuck at 4.5V
Signal jumps
Voltage outside expected range
PLC scaling set for 0–10V by mistake
Step 7: Check PWM Output
Some angle sensors use PWM.
PWM means the output switches on and off quickly.
The angle is represented by duty cycle.
Example:
0° = 10% duty cycle
180° = 50% duty cycle
360° = 90% duty cycle
Use an oscilloscope or meter with duty cycle function.
Good PWM Signal
Stable frequency
Duty cycle changes smoothly with angle
Duty cycle matches sensor range
Clean square wave
Correct voltage level
PLC or controller reads duty cycle correctly
Bad PWM Signal
No pulses
Duty cycle stuck
Frequency unstable
Signal noisy
Wrong voltage level
Controller cannot read duty cycle
Signal drops when cable moves
PWM is difficult to diagnose properly with only a basic multimeter. An oscilloscope is better.
Step 8: Check PNP, NPN, or Relay Switching Outputs
Some angle sensors have switching outputs.
For example:
Output ON below 5°
Output ON above 85°
Valve closed signal
Valve open signal
PNP Output
A PNP output switches positive voltage to the PLC input.
Good PNP Measurements
Output OFF: usually near 0V or floating
Output ON: near +24V DC
PLC input turns ON when output is ON
Sensor LED matches PLC input
Bad PNP Measurements
Output never reaches +24V
Output stuck at +24V
PLC input does not turn ON
Wrong input common
Output overloaded
Shorted cable
NPN Output
An NPN output pulls the PLC input to 0V.
Good NPN Measurements
Output ON: near 0V DC
PLC input turns ON with correct wiring
Correct input type used
Bad NPN Measurements
Sensor connected to wrong PLC input type
Output does not pull low
Output stuck at 0V
No pull-up path
Wrong common wiring
Relay Output
A relay output uses dry contacts.
Good Relay Measurements
NO inactive: open circuit
NO active: closed circuit
NC inactive: closed circuit
NC active: open circuit
A closed relay contact should usually be below 1 Ω plus test lead resistance.
Bad Relay Measurements
Relay contact always open
Relay contact always closed
High resistance when closed
Wrong NO/NC terminal used
Switching point set wrong
Step 9: Simulate the PLC Input
If the angle sensor output is correct but the PLC value is wrong, simulate the PLC input.
For 4–20 mA:
| Simulated Current | PLC Should Show |
|---|---|
| 4 mA | 0% or minimum angle |
| 8 mA | 25% |
| 12 mA | 50% |
| 16 mA | 75% |
| 20 mA | 100% or maximum angle |
For 0–10V:
| Simulated Voltage | PLC Should Show |
|---|---|
| 0V | 0% or minimum angle |
| 2.5V | 25% |
| 5V | 50% |
| 7.5V | 75% |
| 10V | 100% or maximum angle |
If the PLC does not show the correct value, the problem is probably:
PLC scaling
Analog input setting
Wrong signal type
Wrong HMI tag
Wrong engineering range
Wrong channel
Wrong units
Step 10: Check PLC Scaling
PLC scaling mistakes are very common.
Check:
Sensor angle range
PLC engineering range
Analog input type
4–20 mA or 0–20 mA setting
0–10V or 0.5–4.5V setting
Degrees vs percent
Wrong decimal point
Inverted direction
Wrong zero offset
Wrong channel
Wrong HMI tag
Example
Sensor range:
0–90° = 4–20 mA
Measured current:
12 mA
Correct angle:
45°
If the PLC shows 180°, the sensor may be fine. The PLC scaling is probably wrong.
Step 11: Check Rotation Direction
Sometimes the sensor works, but the direction is reversed.
Example:
Valve opening should increase from 0° to 90°.
But the PLC value decreases from 90° to 0°.
Possible Causes
Sensor mounted on opposite side
Magnet orientation reversed
Output direction configured wrong
PLC scaling inverted
Mechanical linkage reversed
Wrong teach points
Good
Angle increases in the expected direction
0° and full-scale position match machine movement
HMI matches real machine position
Bad
Angle decreases when it should increase
Open and closed positions are swapped
Output direction changes after sensor replacement
PLC alarm logic uses wrong direction
This is common after replacement or mechanical adjustment.
Step 12: Check Zero and Span
Many angle sensors need teach or setup.
Check:
Zero position
Full-scale position
Teach minimum
Teach maximum
Mechanical stop position
Output range
Offset setting
Span setting
Good
0° position matches mechanical zero
Full-scale output matches mechanical maximum
Middle position gives middle output
Sensor repeats after power cycle
Bad
Zero shifted
Full scale reached too early
Sensor never reaches full output
Middle angle not centered
Teach points saved incorrectly
Sensor replaced but not re-taught
For valve feedback, always teach or verify closed and open positions.
Step 13: Check Magnet Position and Air Gap
For magnetic angle sensors, magnet alignment is critical.
Check:
Is the magnet present?
Is it the correct magnet?
Is it centered on the sensor axis?
Is the air gap correct?
Is the magnet installed in the correct orientation?
Is the magnet loose?
Does the magnet rotate with the shaft?
Is there shaft wobble?
Good
Magnet centered over sensor
Air gap within datasheet limits
Magnet fixed securely
Magnet rotates smoothly
No wobble
No strong external magnets nearby
Output changes smoothly through the full range
Bad
Magnet missing
Magnet off-center
Air gap too large
Magnet installed backwards
Magnet weak or damaged
Magnet loose on shaft
Shaft wobble changes air gap
Output jumps at certain angles
Sensor only works in part of rotation
A magnetic angle sensor can be electrically perfect but still fail if the magnet is badly installed.
Step 14: Check Mechanical Mounting
Mechanical problems often look like sensor faults.
Check:
Loose sensor bracket
Loose shaft coupling
Actuator backlash
Worn linkage
Bent shaft
Misaligned magnet holder
Vibration
Mechanical stop position
Valve stem movement
Play between sensor and shaft
Good
Sensor fixed firmly
Magnet holder fixed firmly
No backlash
No bracket movement
Shaft rotates smoothly
Sensor follows real mechanical movement
Bad
Sensor moves with vibration
Magnet holder slips
Shaft coupling loose
Valve moves but magnet does not
Reading changes when bracket is touched
Angle differs during opening and closing
Mechanical backlash causes hysteresis
If the angle reading is not repeatable, check mechanics before replacing the sensor.
Step 15: Check External Magnetic Interference
Magnetic angle sensors can be affected by strong external magnetic fields.
Possible sources include:
Large motors
Solenoids
Magnetic brakes
Permanent magnets
High-current busbars
Welding equipment
Magnetic clamps
Nearby magnetic sensors
Strong DC currents
Good
No strong magnetic field near sensor
Sensor output stable when nearby equipment switches
Cable and sensor are routed away from high-current conductors
Magnet field is clean and centered
Bad
Angle jumps when solenoid energizes
Reading changes when motor current changes
Sensor output changes near magnetic brake
Output unstable near welding equipment
Sensor affected by nearby magnet
If the reading changes only when nearby equipment runs, suspect magnetic or electrical interference.
Step 16: Check Cable and Connector
Cable faults are common.
Check:
Loose connector
Broken cable
Crushed cable
Water in connector
Corrosion
Oil damage
Chemical damage
Broken shield
Loose terminal
Cable pulled tight
Wrong pinout
Good
Connector dry
Cable intact
No corrosion
Terminals tight
Signal stable when cable is moved
Shield connected correctly
Bad
Angle jumps when cable is touched
Water in connector
Green corrosion
Intermittent output
Broken conductor
Short to ground
Wrong pin connection
Connector not sealed
Move the cable gently while watching the output.
If the value jumps, suspect cable or connector damage.
Step 17: Check Insulation Resistance
Insulation problems can cause random faults and signal drift.
Disconnect the sensor from electronics before testing.
General Practical Values
| Insulation Resistance | Meaning |
|---|---|
| >100 MΩ | Very good |
| 20–100 MΩ | Usually acceptable, check manual |
| 1–20 MΩ | Suspicious |
| <1 MΩ | Usually bad |
Low insulation can be caused by:
Water in connector
Damaged cable
Chemical ingress
Cracked housing
Condensation
Poor cable gland
Do not insulation-test connected sensor electronics unless the manufacturer allows it.
Step 18: Check Grounding and Shielding
Angle sensor signals can be affected by electrical noise.
Common noise sources include:
VFD motor cables
Servo drives
Contactors
Solenoid valves
Welding equipment
High-current cables
Poor grounding
Long analog cable runs
Good
Signal cable separated from motor cables
Shield connected according to manual
Ground difference close to 0V
Analog signal stable
No jumps when motors start
No spikes on oscilloscope
Bad
Angle jumps when VFD starts
Value changes with motor speed
Cable routed with power cable
Shield disconnected
Ground difference above about 1V AC or DC
Output signal noisy
PLC value unstable but sensor display stable
Measure voltage between sensor body, machine frame, and panel PE.
Ideally, it should be close to 0V.
Step 19: Check Digital Communication
Smart angle sensors may use:
IO-Link
CANopen
Modbus
SSI
PROFINET
EtherNet/IP
Common problems include:
Wrong address
Wrong baud rate
Wrong process data mapping
Wrong byte order
Wrong units
Wrong scaling factor
PLC reading raw value incorrectly
Sensor replaced but not parameterized
Communication timeout
Wrong device profile
Wrong zero stored in sensor
Good
Communication stable
PLC reads correct process value
Units and scaling match sensor configuration
No timeout errors
Zero and span parameters correct
Bad
Sensor display correct but PLC digital value wrong
Angle value multiplied or divided incorrectly
Wrong byte order
PLC reads status word instead of angle value
Communication drops randomly
Wrong node or address
Step 20: Check Repeatability
Repeatability means the same angle gives the same reading every time.
Test it like this:
Move to 0°.
Move to 45°.
Move to 90°.
Return to 45°.
Return to 0°.
Good
Same angle gives almost the same value each time
Output returns to zero
No large hysteresis
Opening and closing readings are close
Bad
Same angle gives different values
Output shifts after movement
Reading depends on rotation direction
Value changes after vibration
Zero does not return
Middle point changes every cycle
Bad repeatability often points to mechanical backlash, loose magnet, shaft play, or loose bracket.
Step 21: Check Linearity
Linearity means the output follows the angle evenly across the range.
Example for 0–90° = 4–20 mA:
| Angle | Expected Current |
|---|---|
| 0° | 4 mA |
| 22.5° | 8 mA |
| 45° | 12 mA |
| 67.5° | 16 mA |
| 90° | 20 mA |
Good
Output increases evenly
Middle angle gives middle output
End points match range
No sudden jumps
Bad
Correct at zero but wrong at middle
Correct at middle but wrong at full scale
Output jumps around one angle
Output is nonlinear
Sensor only works over part of range
Possible causes include bad magnet alignment, wrong teach settings, wrong magnet type, or mechanical nonlinearity.
Troubleshooting by Symptom
1. No Output Signal
Possible causes:
No power
Wrong wiring
Broken cable
Sensor damaged
Wrong output type
PLC input fault
Communication failure
Checks:
Measure power supply
Check pinout
Measure output signal
Check cable continuity
Check sensor LED
Check PLC input
2. Output Stuck at Minimum
Possible causes:
Shaft at minimum angle
Magnet missing
Magnet too far away
Sensor not taught
Output stuck at 4 mA or 0V
PLC scaling wrong
Broken signal wire
Checks:
Rotate shaft safely
Check magnet
Check air gap
Measure output directly
Check teach settings
Simulate PLC input
3. Output Stuck at Maximum
Possible causes:
Shaft at maximum angle
Wrong range
Output saturated
Magnet misaligned
Sensor overrange
PLC scaling wrong
Sensor fault
Checks:
Rotate shaft back
Measure output
Check sensor display
Check range configuration
Check magnet alignment
Check PLC scaling
4. Angle Reading Too High
Possible causes:
Wrong scaling
Wrong zero point
Wrong span
Magnet offset
Sensor mounted incorrectly
PLC range too small
Mechanical linkage ratio error
Checks:
Compare with reference angle
Measure output signal
Check PLC scaling
Check teach values
Check magnet alignment
5. Angle Reading Too Low
Possible causes:
Wrong scaling
Sensor not reaching full range
Air gap too large
Magnet weak
Wrong zero/span
Mechanical slip
PLC range too large
Checks:
Check full mechanical travel
Measure output at end positions
Check air gap
Check magnet
Check PLC scaling
6. Angle Jumps Randomly
Possible causes:
Loose connector
Cable damage
Electrical noise
Magnet wobble
Loose bracket
External magnetic field
VFD interference
Bad grounding
Checks:
Move cable gently
Check bracket
Check magnet holder
Check shielding
Use oscilloscope
Watch signal when motors start
7. Angle Direction Is Reversed
Possible causes:
Sensor mounted opposite way
Magnet orientation reversed
PLC scaling inverted
Wrong teach order
Output direction parameter wrong
Checks:
Rotate shaft in known direction
Watch output increase/decrease
Check teach minimum and maximum
Check PLC scaling
Check sensor configuration
8. PLC Value Wrong but Sensor Output Correct
Possible causes:
Wrong PLC scaling
Wrong input type
Wrong HMI tag
Wrong engineering range
Wrong units
Wrong digital mapping
Checks:
Measure 4–20 mA or voltage
Simulate PLC input
Check raw input value
Check HMI scaling
Check communication data
Quick Measurement Table
| Test | Good Measurement | Bad Measurement |
|---|---|---|
| 24V DC supply | Usually 20.4–28.8V DC | Missing, low, unstable, reversed |
| 4–20 mA at 0% | Around 4 mA | 0 mA, alarm current, unstable |
| 4–20 mA at 50% | Around 12 mA | Wrong current for angle |
| 4–20 mA at 100% | Around 20 mA | Saturated or wrong scaling |
| 0–10V at 0% | Around 0V | Stuck, noisy, wrong output |
| 0–10V at 50% | Around 5V | Wrong voltage |
| 0–10V at 100% | Around 10V | Stuck or unstable |
| 0.5–4.5V at 50% | Around 2.5V | 0V, 5V, or unstable |
| PNP output ON | Near +24V DC | Low voltage or no change |
| NPN output ON | Near 0V DC | Does not pull low |
| Relay closed | Usually <1 Ω plus leads | High resistance or open |
| Insulation resistance | >100 MΩ very good | <1 MΩ usually bad |
| Ground difference | Close to 0V | >1V suspicious |
| PLC simulation | Correct scaled value | Scaling/input problem |
| Reference angle check | Output matches real angle | Offset, reversed, nonlinear |
What Measurements Are Usually Good?
These are general practical values:
24V DC supply around 20.4–28.8V DC
4 mA at minimum angle for a 4–20 mA sensor
12 mA at middle angle
20 mA at maximum angle
0V at minimum angle for a 0–10V sensor
5V at middle angle
10V at maximum angle
0.5V at minimum angle for a 0.5–4.5V sensor
2.5V at middle angle
4.5V at maximum angle
PNP output ON close to +24V DC
NPN output ON close to 0V DC
Relay closed below about 1 Ω plus lead resistance
Insulation resistance above 100 MΩ is very good
Ground voltage difference close to 0V
Output changes smoothly with rotation
Same angle gives the same output repeatedly
PLC value matches measured signal after scaling
What Measurements Are Usually Bad?
These readings usually indicate a problem:
0V supply
Wrong polarity
24V supply below allowed range
4–20 mA output at 0 mA
Output below 3.6 mA or above 21 mA without known reason
4 mA all the time while shaft rotates
20 mA all the time while shaft rotates
0–10V output stuck at 0V or 10V
0.5–4.5V output at 0V or 5V
Voltage jumps when cable is touched
Output noisy when motor starts
PNP output not reaching +24V
NPN output not pulling to 0V
Relay contact high resistance when closed
Insulation resistance below 1 MΩ
Angle value changes when bracket is touched
Angle value changes with vibration
PLC value does not match measured output
Angle direction reversed
Output not repeatable at the same angle
Practical Diagnostic Order
When diagnosing an angle measuring sensor, I would follow this order:
- Identify sensor type and output signal.
- Check the real mechanical angle and movement.
- Check local sensor LEDs, display, and diagnostics.
- Measure power supply voltage.
- Measure output signal: 4–20 mA, 0–10V, PWM, PNP/NPN, or relay.
- Compare sensor output with PLC/HMI value.
- Simulate PLC input to check scaling.
- Check PLC range, units, and direction.
- Check zero and span settings.
- Check magnet position and air gap.
- Check sensor and magnet mounting.
- Check for external magnetic interference.
- Check cable, connector, and terminals.
- Check insulation resistance if allowed.
- Check grounding, shielding, and noise.
- Check digital communication mapping if used.
- Test repeatability at known angles.
- Test linearity across the range.
This order helps avoid replacing a good sensor when the real problem is magnet alignment, wiring, scaling, or mechanical play.
Final Thoughts
Angle sensor troubleshooting is both an electrical and mechanical task.
A magnetic angle sensor may be electrically healthy but still give a wrong value if the magnet is missing, misaligned, too far away, loose, or affected by external magnetic fields.
The most useful tools are:
Digital multimeter
Loop calibrator
Oscilloscope
Digital angle gauge
Protractor
Feeler gauge or caliper
Gauss meter
PLC software
Sensor configuration tool
Insulation tester
The most important measurements are:
Power supply voltage
4–20 mA output
0–10V output
0.5–4.5V output
PWM duty cycle
PNP/NPN output voltage
Relay contact resistance
Air gap
Reference mechanical angle
Insulation resistance
Ground voltage difference
PLC raw and scaled values
The key rule is simple:
If the sensor output is correct but the PLC value is wrong, check scaling.
If the output is wrong but the sensor has power, check magnet position, air gap, zero/span, and mechanical mounting.
If the signal jumps randomly, check cable, grounding, vibration, and external magnetic interference.