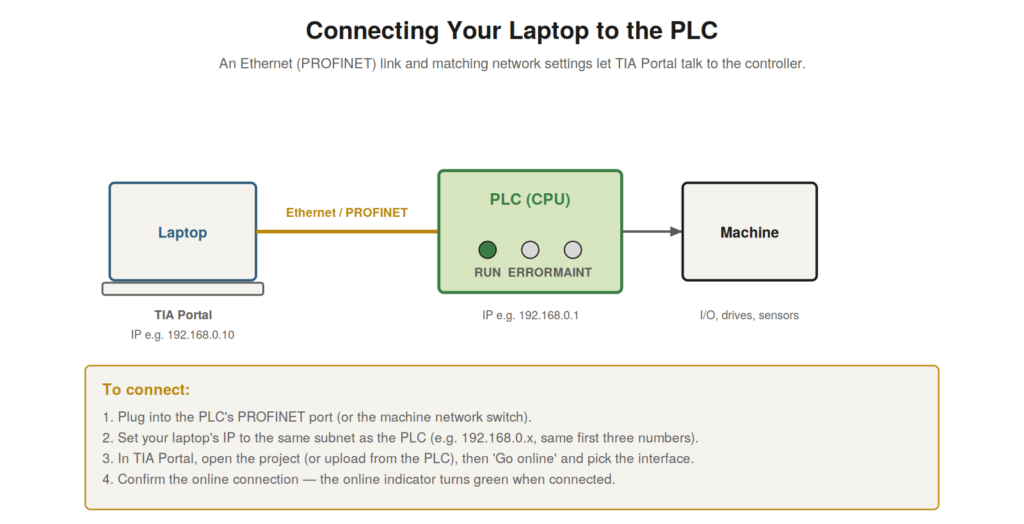
Before you can go online with a controller, you must physically
connect to it and set up the network so your laptop and the PLC can
communicate. This connection — an Ethernet link with matching network
settings — is the practical first step of all online work, and
understanding it prevents the frustration of not being able to reach the
controller. Once connected, everything else — going online, monitoring,
diagnosing — becomes possible.
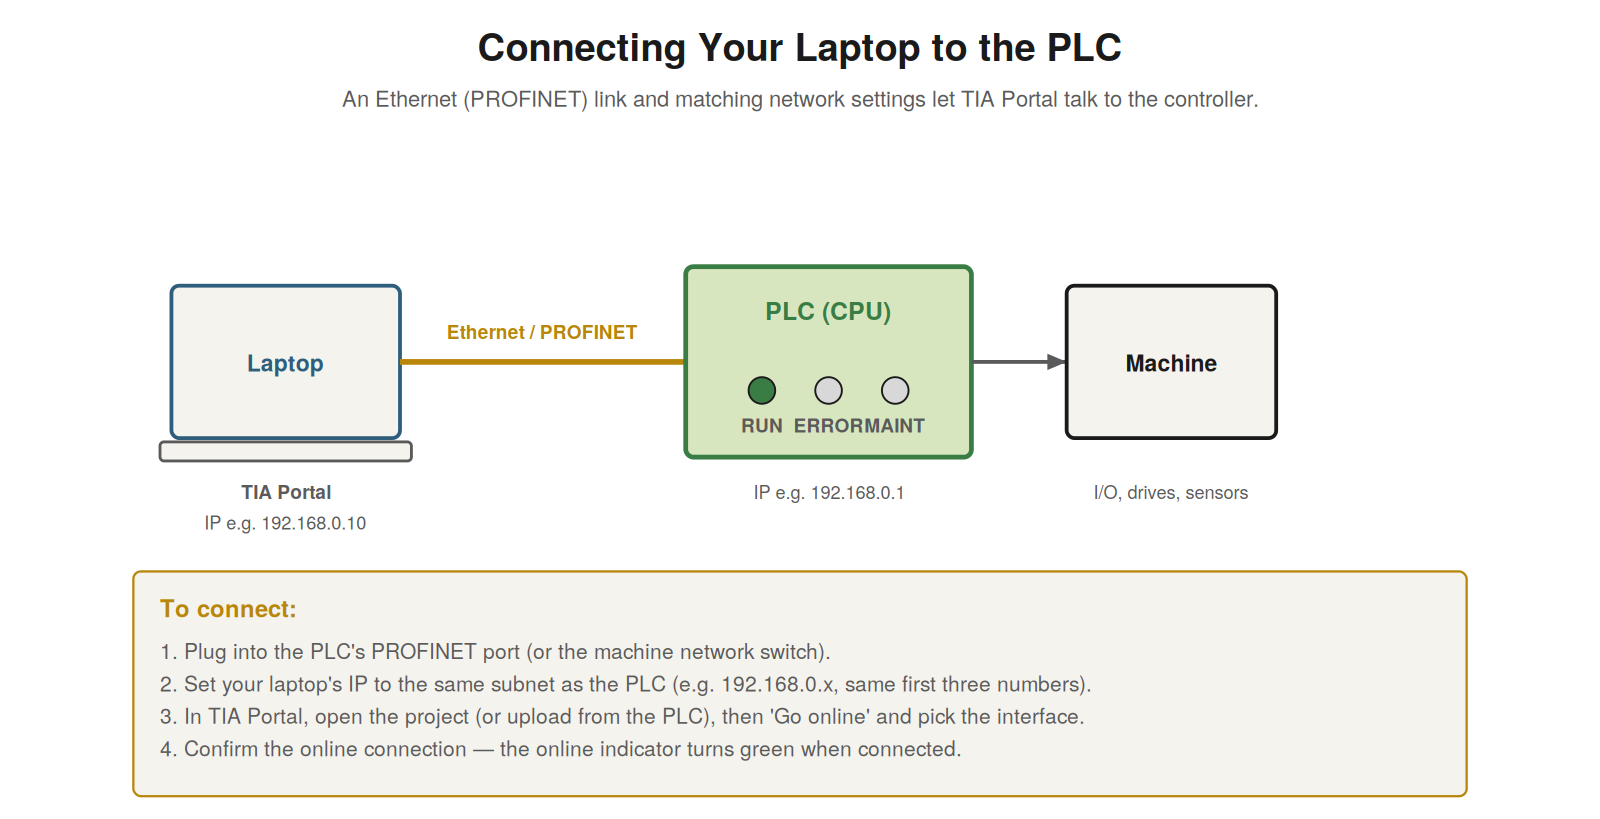
(PROFINET) link and matching network settings. Set your laptop’s IP to
the same subnet as the PLC, then go online and select the interface. The
online indicator confirms the connection.
The physical connection
The physical connection to a modern Siemens PLC is normally Ethernet,
using the PROFINET protocol that Siemens controllers use for
communication. You connect your laptop to the controller either directly
(an Ethernet cable from your laptop to the PLC’s PROFINET port) or
through the machine’s network (plugging into a network switch that the
PLC is on). The PROFINET port on the CPU is a standard Ethernet port,
and a standard Ethernet cable connects to it. For a machine with
distributed I/O or multiple devices on a network, plugging into the
network switch lets you reach all of them. Understanding the physical
connection — Ethernet to the PLC’s PROFINET port, directly or via the
network — is the first step. It reinforces that connecting to a modern
Siemens PLC is an Ethernet connection, made directly to the CPU or
through the machine network, using a standard Ethernet cable.
Understanding this physical connection — where to plug in and how — is
the practical starting point for online work, so that you can establish
the physical link to the controller, which is the necessary foundation
before any network configuration or going online, connecting your laptop
to the PLC through the Ethernet/PROFINET link that Siemens controllers
use.
Network settings: the same subnet
For your laptop and the PLC to communicate, they must be on the same
network — the same subnet — which usually means setting your laptop’s IP
address appropriately, and understanding this prevents the common
problem of a connection that will not establish. Every device on an
Ethernet network has an IP address, and for two devices to communicate
directly, their addresses must be in the same subnet — typically meaning
the first three numbers of the IP address match (like 192.168.0.x),
while the last number differs. So if the PLC’s address is 192.168.0.1,
your laptop should be set to something like 192.168.0.10 — same first
three numbers, different last. If your laptop is on a different subnet
(different first three numbers), it cannot reach the PLC, and going
online fails. Setting your laptop’s IP to the PLC’s subnet is thus a key
step. Understanding this — that laptop and PLC must share a subnet,
usually meaning matching the first three IP numbers — prevents the
frequent problem of being unable to connect. It reinforces that a
successful connection requires the laptop and PLC on the same subnet,
achieved by setting the laptop’s IP appropriately, so that when going
online fails, checking that your laptop’s IP is in the PLC’s subnet is a
first thing to verify. Understanding the same-subnet requirement — and
how to set your laptop’s IP to meet it — is essential to establishing
communication, resolving the common connection failures that a subnet
mismatch causes and enabling the online work that a proper network
connection makes possible.
Establishing the online connection
With the physical connection made and the network settings right, you
establish the online connection in TIA Portal, and understanding the
process completes the connection skill. In TIA Portal, with the project
open, you initiate going online (the ‘Go online’ command), and TIA
Portal asks which interface to use (your laptop’s Ethernet adapter) and
searches the network for the controller. When it finds the PLC, you
select it and connect, and TIA Portal establishes the online connection.
The interface then indicates the online state — the title bar changes
color (typically to orange) and online indicators appear — confirming
you are connected. If the PLC is not found, the problem is usually in
the physical connection or the network settings (the subnet).
Understanding this process — initiate go online, select the interface,
find and select the PLC, confirm the online state — completes the
connection procedure. It reinforces that establishing the online
connection is a matter of the ‘Go online’ command, selecting the
interface, and finding the PLC, with the online state confirmed by the
interface indicators. Understanding how to establish the online
connection — and how to confirm it succeeded — completes the practical
skill of connecting to the PLC, so that you can reliably get online with
a controller, which is the gateway to all the monitoring and diagnosis
this book covers, achieved through the physical connection, the network
settings, and the go-online process that together establish
communication with the controller.
When you don’t have the project
A common practical situation is arriving at a machine without its TIA
Portal project, and understanding how to handle this — by uploading from
the PLC — is valuable. Ideally you have the machine’s project to open,
but sometimes you do not: the project is lost, unavailable, or you are
at an unfamiliar machine. In this case, provided you can connect and
have a compatible TIA Portal version, you can upload the program from
the PLC itself — retrieving the running program onto your laptop — which
gives you the actual program to view and work with. The uploaded program
may lack some comments and symbolic names (depending on what is stored
in the PLC), but it gives you the real logic. So not having the project
need not stop you: uploading from the PLC provides the running program.
Understanding this — that you can upload from the PLC when you lack the
project — handles a common practical situation. It reinforces that the
running program can be uploaded from the PLC when the project is
unavailable, giving you the actual logic to work with, so that lacking
the project is not an insurmountable obstacle. Understanding how to
handle not having the project — by uploading from the PLC — is
practically valuable, because it lets you work on a machine even without
its project file, retrieving the running program directly from the
controller, which is a common and useful capability when the original
project is lost or unavailable, though the uploaded program may lack
some of the comments and names that the original project would have.
Scenario: the connection that wouldn’t work
A scenario shows diagnosing a connection problem. A technician
plugged into a PLC and tried to go online, but TIA Portal could not find
the controller — the connection would not work. Rather than being stuck,
they checked the connection systematically. The physical connection
looked fine (cable plugged in, link lights on). So they checked the
network settings and found the problem: their laptop’s IP address was on
a different subnet than the PLC — the first three numbers did not match.
They set their laptop’s IP to the PLC’s subnet, and TIA Portal
immediately found the controller and went online. The problem had been
the classic subnet mismatch, resolved by setting the laptop’s IP
correctly. This scenario shows a connection problem — the common subnet
mismatch — diagnosed and fixed. Understanding that the laptop and PLC
must share a subnet let the technician check and fix the IP setting,
resolving the connection failure. It reinforces that connection failures
often come down to the network settings (the subnet), checked when a
connection will not establish. The scenario reinforces understanding the
connection requirements: the technician resolved a failed connection by
recognizing and fixing a subnet mismatch, which is the most common
connection problem, illustrating how understanding the same-subnet
requirement lets you diagnose and fix the connection failures that
otherwise leave you unable to reach the controller.
Finding the PLC’s IP address
A practical technique that helps with connection is finding out the
PLC’s IP address when you do not know it, because you need it (or its
subnet) to set your laptop correctly. Sometimes you arrive at a machine
not knowing the PLC’s IP address. Several approaches help: the project
(if you have it) shows the configured IP in the device configuration;
TIA Portal’s ‘accessible devices’ function can scan the network and find
connected devices and their addresses (useful when you do not know the
address); the machine’s documentation may record it; and the address is
sometimes labeled on the machine or the PLC. Once you know the PLC’s
address (or at least its subnet — the first three numbers), you can set
your laptop’s IP to match. So finding the PLC’s address, via the
project, an accessible-devices scan, or documentation, enables the
connection. Understanding how to find the PLC’s IP address — via the
project, a network scan, or documentation — helps you connect when you
do not know it. Understanding how to find the PLC’s IP address — through
the project’s configuration, TIA Portal’s accessible-devices scan, or
the machine documentation — is a practical technique for connecting when
you do not already know the address, so that you can determine the PLC’s
address or subnet and set your laptop to match, resolving the common
situation of needing to connect to a machine whose network address you
do not initially know, which the accessible-devices scan in particular
makes straightforward by finding the connected devices and their
addresses.
Connection as the enabling first step
Consolidating the connection material, establishing the connection is
the enabling first step for all online work, and understanding it this
way emphasizes getting it right. Everything valuable in maintenance —
monitoring, diagnosing, backing up, downloading — requires being online,
which requires the connection. So the connection is the gateway: without
it, none of the online capabilities are available; with it, all of them
open up. This makes getting the connection right — the physical link,
the network settings, the go-online process — essential, the enabling
first step. A technician who can reliably connect has access to
everything online; one who struggles to connect is blocked from all of
it. So the connection skills, though they may seem merely preliminary,
are the essential enabler. Understanding connection as the enabling
first step — the gateway to all online work — emphasizes the importance
of getting it right reliably. Understanding the connection as the
enabling first step for all online work — the gateway without which none
of the online capabilities are available — emphasizes the importance of
getting it right reliably, so that the connection skills (the physical
link, the matching network settings, the go-online process), though
preliminary, are recognized as the essential enabler of everything
valuable that follows, making reliable connection a skill worth
mastering because it opens access to all the monitoring, diagnosis,
backup, and download capabilities that the rest of the book covers and
that maintenance work depends on.