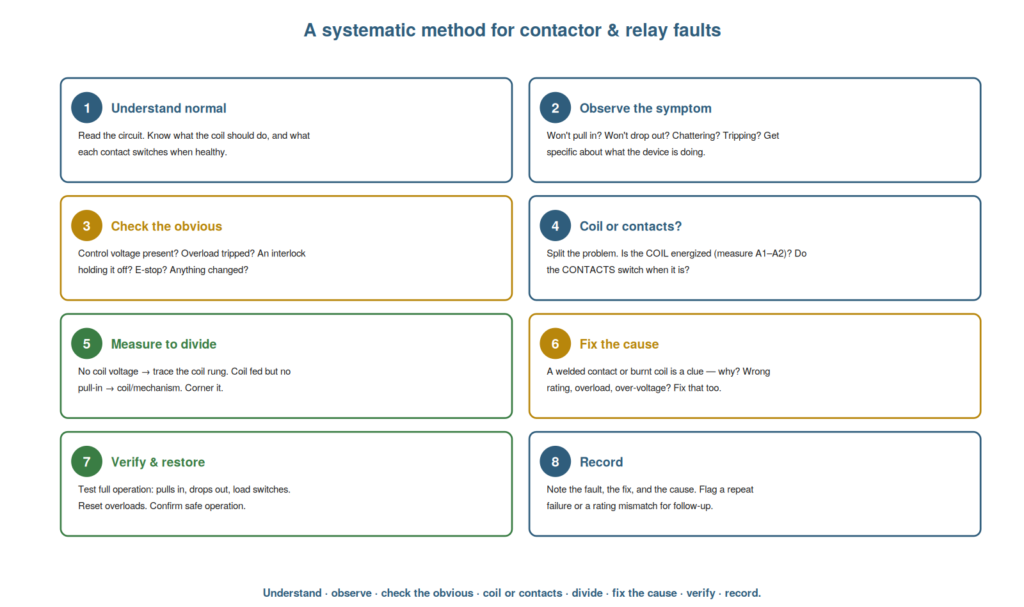
Drawing the book’s techniques together, this chapter lays out a systematic method for contactor and relay troubleshooting — a repeatable sequence from symptom to fixed fault — because a method is what turns scattered techniques into reliable troubleshooting. The method embodies the book’s compass and works for any contactor or relay fault. Understanding it as a coherent whole equips you to approach any such problem with confidence. This chapter presents the systematic method step by step.
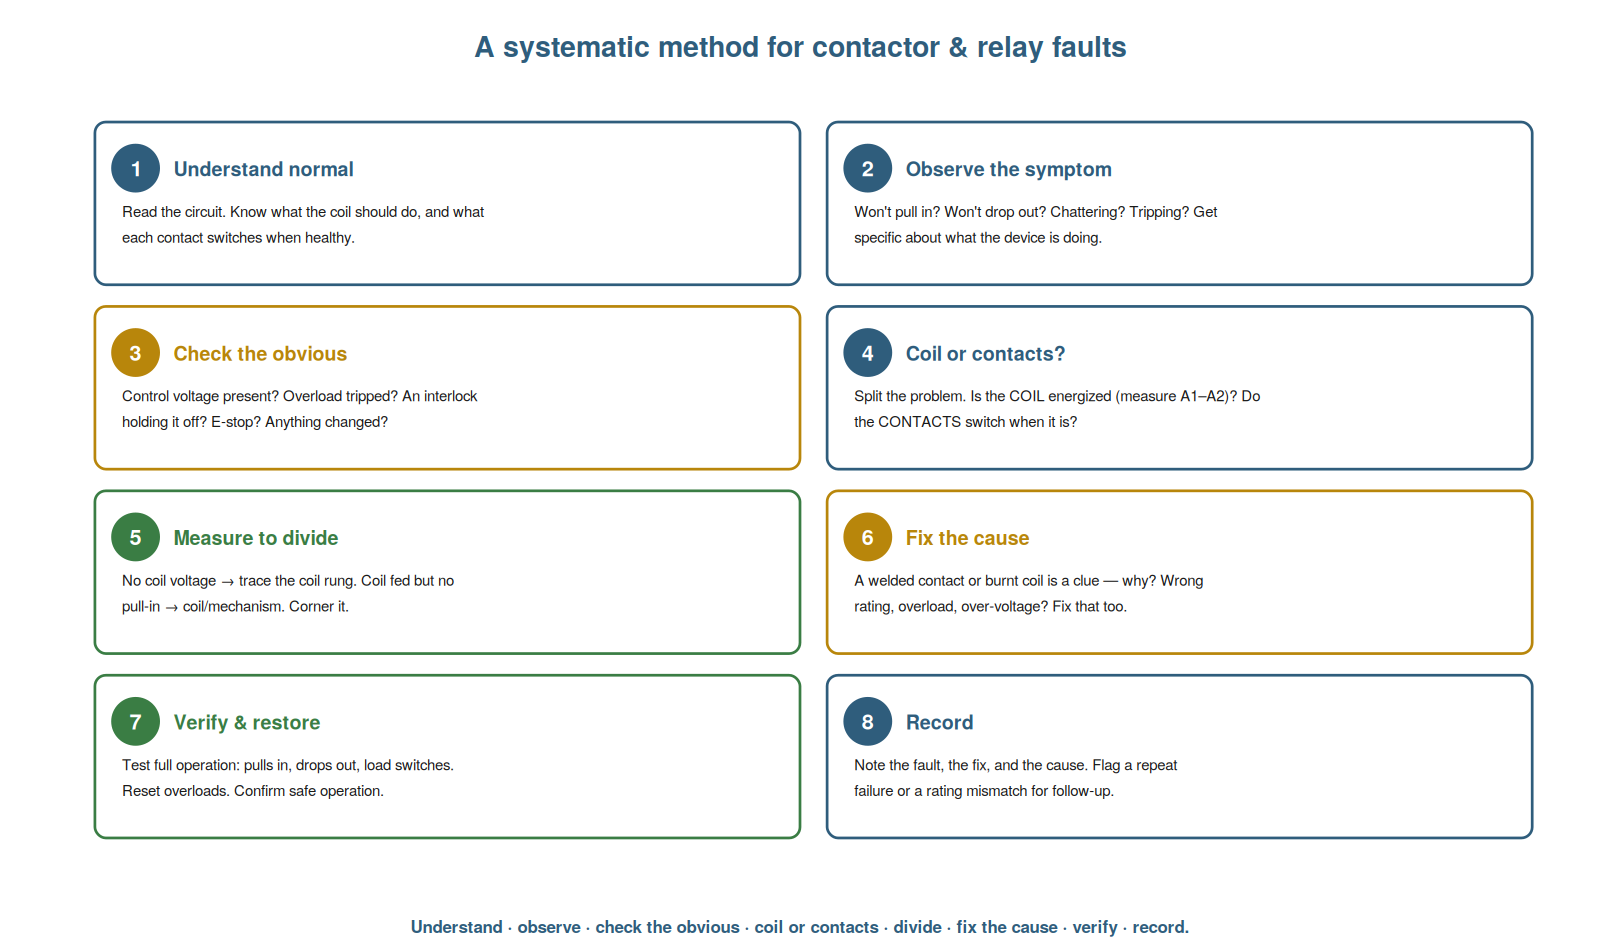
The eight steps
The systematic method has eight steps, and understanding them as a sequence gives you a reliable procedure for any contactor or relay fault. First, understand normal: read the circuit, know what the coil should do and what each contact switches when healthy. Second, observe the symptom: won’t pull in, won’t drop out, chattering, tripping? — get specific. Third, check the obvious: control voltage present, overload tripped, an interlock holding it off, an E-stop, anything changed? Fourth, coil or contacts?: split the problem — is the coil energized (measure A1–A2)? do the contacts switch when it is? Fifth, measure to divide: no coil voltage means trace the coil rung; coil fed but no pull-in means the coil or mechanism; corner the fault. Sixth, fix the cause: a welded contact or burnt coil is a clue — why? — fix that too. Seventh, verify and restore: test full operation (pulls in, drops out, load switches), reset overloads, confirm safe operation. Eighth, record: note the fault, fix, and cause, flagging a repeat failure or rating mismatch. So the eight steps form a complete method. Understanding them as a sequence gives a reliable procedure for any fault. Understanding the eight steps — understand normal, observe the symptom, check the obvious, ask coil or contacts, measure to divide, fix the cause, verify and restore, and record — gives you a reliable procedure for any contactor or relay fault, so that you have a complete, repeatable sequence from symptom to fixed fault, embodying the book’s techniques and compass, which you can apply with confidence to any problem and which turns the individual skills the book has taught into dependable troubleshooting through a coherent step-by-step approach.
Coil or contacts: the pivotal question
The pivotal step in the method is asking ‘coil or contacts?’, and understanding why this question is so central shows how it directs the whole diagnosis. Every contactor and relay fault is ultimately about the coil (the input) or the contacts (the output): the coil not operating, or the contacts not switching. So asking ‘coil or contacts?’ — and answering it by measuring — splits every fault into the right half immediately. Is the coil energized (measure the coil voltage)? If not, the problem is the coil not being fed or the coil itself — the input side. If the coil is energized but the device is not doing its job, the problem is the contacts not switching — the output side. This one question directs you to the right half of every fault, avoiding aimless checking. Understanding its centrality shows why it is the pivotal step: it is the fork that sends the diagnosis down the correct path (coil-side or contact-side) for any fault. So understanding ‘coil or contacts?’ as the pivotal question shows how it directs the whole diagnosis to the right half. Understanding ‘coil or contacts?’ as the pivotal question — the fork that splits every fault into the input side (coil not operating) or the output side (contacts not switching), answered by measuring whether the coil is energized — shows how it directs the whole diagnosis, so that this single question sends you immediately to the right half of any contactor or relay fault (the coil and its feed, or the contacts and their switching) rather than checking aimlessly, which is why it is the central, pivotal step of the method and the practical form of the book’s ‘know the coil and the contacts’ compass.
Fix the cause, not the symptom
A principle woven through the method deserves emphasis: fix the cause, not just the symptom, and understanding it prevents faults from recurring, which is especially important with contactors and relays. Many contactor and relay faults have a symptom that is easy to address and a cause that is the real problem: a burnt coil (symptom) from the wrong voltage (cause); welded contacts (symptom) from a heavy fault current or an overload (cause); a nuisance trip (symptom) from a mis-set overload (cause); rapid contact wear (symptom) from an under-rated device (cause). Fixing only the symptom — replacing the burnt coil, the welded contactor — leaves the cause to strike again (the new coil burns out, the new contactor welds). Fixing the cause — correcting the voltage, finding the fault current, correcting the setting, fitting a correctly-rated device — resolves it for good. So the principle is to ask why the device failed and address that root, not just replace the failed part. Understanding this prevents recurrence, which is common with contactors and relays if the cause is ignored. So understanding fix-the-cause-not-the-symptom prevents the recurring failures common with contactors and relays. Understanding to fix the cause, not just the symptom — asking why a coil burnt (wrong voltage), why contacts welded (a fault current or overload), why an overload nuisance-trips (a mis-setting), or why contacts wear fast (an under-rated device), and addressing that root rather than just replacing the failed part — prevents faults from recurring, so that you resolve the cause behind a contactor or relay failure rather than fitting a replacement that the same cause will destroy, which is especially important with these devices because ignoring the cause (a wrong voltage, a fault current, a mis-setting, an under-rating) leads directly to the replacement failing the same way, making ‘fix the cause’ the discipline that turns a repeated failure into a lasting repair.
Working from the symptom to the likely half
A refinement of the method worth understanding is that the symptom itself often suggests which half — coil or contacts — to suspect first, letting you work efficiently. Different symptoms point to different halves: a contactor that will not pull in points to the coil side (is it fed? is it good?); a contactor that will not drop out points to the coil still being fed or the contacts being welded; a weak or unswitched load with the coil clearly energized points to the contacts; chatter points to the coil voltage; a nuisance trip points to the overload, not the contactor. So the symptom guides your first suspicion — which half to check first — before you even measure. Understanding this makes the method efficient: rather than always starting neutrally, you let the symptom direct you to the likely half, then confirm by measurement. This does not skip the ‘coil or contacts?’ measurement — you still confirm — but it tells you which to expect and check first. So understanding working from the symptom to the likely half makes the method efficient by directing your first suspicion. Understanding how to work from the symptom to the likely half — letting a won’t-pull-in point to the coil side, a won’t-drop-out to a fed coil or welded contacts, a weak load with the coil energized to the contacts, chatter to the coil voltage, and a nuisance trip to the overload — makes the method efficient, so that you let the symptom direct your first suspicion to the likely half (coil or contacts) before confirming by measurement, which does not skip the pivotal measurement but tells you which half to expect and check first, making the systematic method faster by using the symptom to guide where you look.
Scenario: the method under pressure
A scenario shows the method proving its worth under the pressure of a stopped line. A production line was down, people were waiting, and the pressure to fix it fast tempted the technician to start swapping contactors. Instead, he held to the method. He understood normal (read the circuit for the stopped drive), observed the symptom (the contactor was not pulling in), checked the obvious (control voltage present, but he noticed the overload had tripped), and asked coil or contacts — measuring the coil, which read no voltage, because the tripped overload’s contact was open in the coil circuit. Rather than just resetting, he found why the overload tripped: a genuinely overloaded conveyor. He cleared the overload (the jammed conveyor), reset the overload relay, verified the drive ran, and recorded it. The method, followed calmly under pressure, found and fixed the real cause faster than swapping contactors would have — and avoided resetting into a real overload. This scenario shows the method proving faster and safer than guessing under pressure. Understanding the method as a reliable sequence let the technician stay calm and find the real cause efficiently. It reinforces that following the method under pressure beats panicked part-swapping. The scenario reinforces the systematic method: under the pressure of a stopped line, the technician found the real cause faster by following the method — understanding normal, observing, checking the obvious (a tripped overload), asking coil-or-contacts, and finding why the overload tripped — than swapping contactors would have, illustrating how the method is most valuable when pressure tempts you to abandon it, delivering a reliable and safe diagnosis when it matters most.
Recording the cause, not just the fix
A refinement of the recording step worth understanding is recording the cause, not just the fix, because the cause is what prevents recurrence and informs the future. It is easy to record only what was done (replaced the contactor) — but the more valuable record includes why (the contactor’s contacts welded because a downstream fault drew heavy current, which was also fixed). Recording the cause captures the real lesson: not just that a part was replaced, but what caused it to fail, so that a recurrence can be recognized and prevented. This matters especially for repeat failures and rating issues: a record showing a coil burned out due to a wrong voltage, or contacts wore out due to under-rating, flags the underlying issue for correction and warns if it recurs. So recording the cause — the why behind the fix — builds a record that prevents recurrence and informs future troubleshooting, far more valuable than recording only the replacement. Understanding this makes your records genuinely useful. So understanding recording the cause, not just the fix, builds records that prevent recurrence. Understanding to record the cause, not just the fix — capturing why the device failed (a downstream fault welding the contacts, a wrong voltage burning the coil, an under-rating wearing the contacts) alongside what was done — builds records that prevent recurrence and inform the future, so that your record captures the real lesson rather than just the replacement, flagging underlying issues (a wrong voltage, an under-rating) for correction and enabling a recurrence to be recognized, which makes your records genuinely useful for preventing repeat failures rather than merely logging that a part was swapped.
The method as what makes you reliable
To close, it is worth recognizing that the systematic method is what makes a troubleshooter reliable, because it is the difference between consistent success and hit-or-miss guessing. Individual knowledge and techniques matter, but it is the method — understand, observe, check the obvious, coil or contacts, divide, fix the cause, verify, record — that ensures you apply them consistently and find the fault reliably, fault after fault, rather than sometimes getting lucky and sometimes floundering. A technician with the method is dependable; one without it is inconsistent. So the method is what makes you reliable, and internalizing it is what makes you a troubleshooter others can count on. Understanding this shows why the method, more than any single technique, is worth mastering. So understanding the method as what makes you reliable shows why it is worth internalizing. Understanding the systematic method as what makes you reliable — the disciplined sequence ensuring you apply your knowledge and techniques consistently to find the fault reliably, fault after fault, rather than sometimes getting lucky and sometimes floundering — shows why it is worth internalizing, so that you recognize the method as the difference between the dependable troubleshooter and the inconsistent one, the framework that turns individual skills into reliable results and makes you a technician others can count on to find the fault, which is the deeper value of the systematic method beyond any single step or technique.