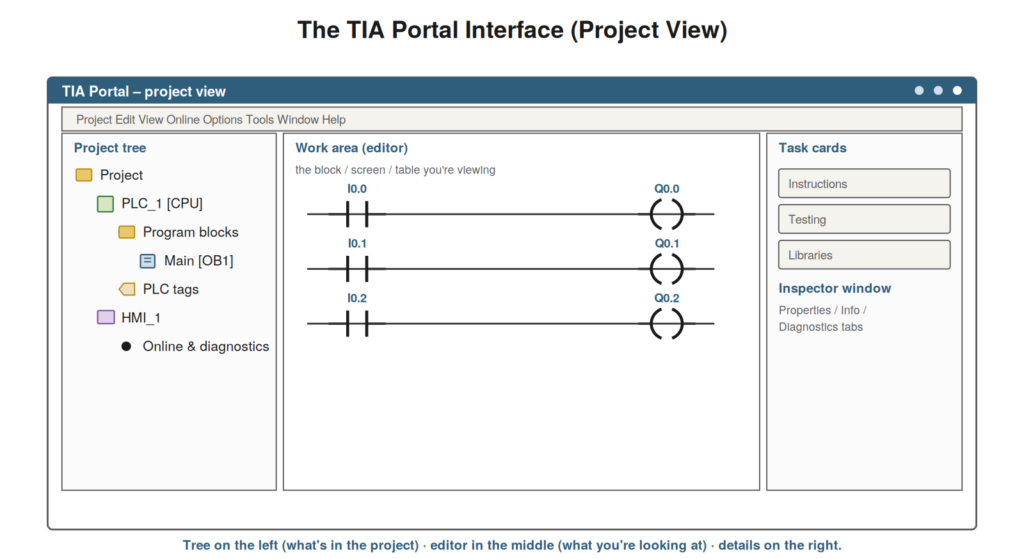
To use TIA Portal, you must be able to navigate it, and its
interface, while large, is logically organized. The two things to master
first are the overall layout of the interface — where things are on
screen — and the project tree, which is your map of everything in the
project. Once you can find your way around the interface and navigate
the project tree, you can locate anything you need, which is the
foundation for all the maintenance work that follows.
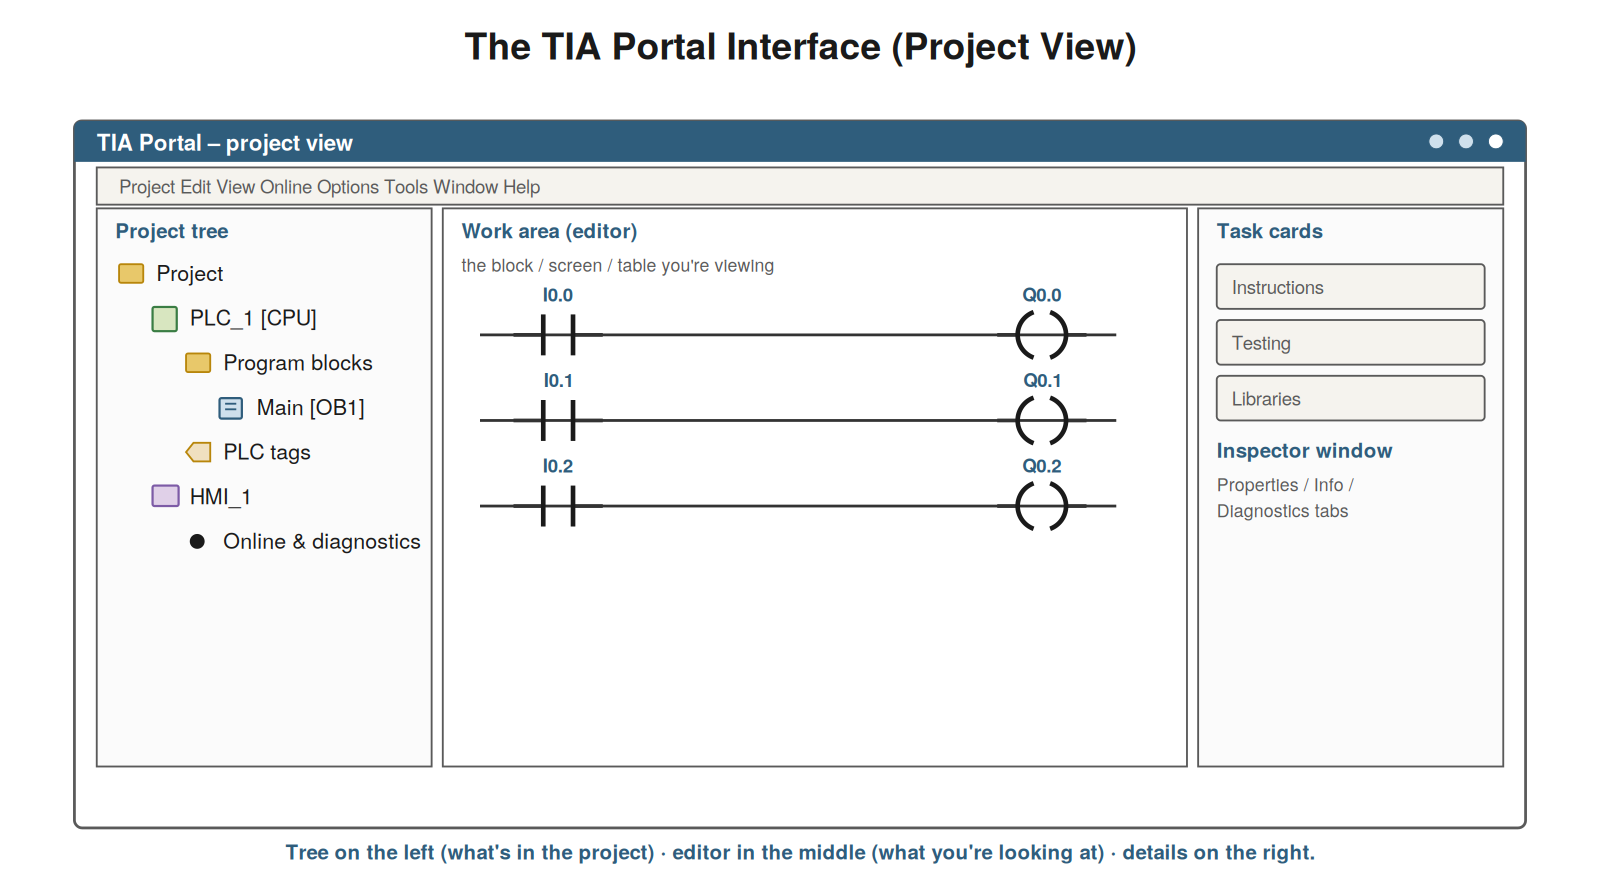
left (what’s in the project), the work area in the middle (the block,
screen, or table you’re viewing), and task cards and the inspector on
the right (details and tools).
The overall layout
TIA Portal’s main working screen — the project view — has a
consistent layout that, once learned, makes everything findable. On the
left is the project tree, a hierarchical list of everything in the
project (the devices, the program blocks, the tags, and more) — your
navigation map. In the middle is the work area, where whatever you have
opened is displayed: a program block you are viewing, an HMI screen, a
watch table. On the right are the task cards (tools and instructions)
and, along the bottom, the inspector window (showing properties,
information, and diagnostics for whatever is selected). So the layout
is: navigate on the left, view in the middle, see details on the right
and bottom. Understanding this layout — tree on the left, work area in
the middle, details on the right and bottom — orients you to the
interface. It reinforces that TIA Portal, though it has many features,
has a consistent organization: you navigate to things via the tree, view
them in the work area, and see their details in the inspector.
Understanding this fundamental layout — where to navigate, where things
display, where details appear — makes the interface navigable, so that
you can find and open what you need and see its details, which is the
basic skill of working in TIA Portal, underlying all the monitoring and
diagnosis that follow from being able to navigate to and view the
relevant parts of the project.
The project view and the portal view
TIA Portal actually offers two ways to view a project — the project
view and the portal view — and understanding the difference lets you
choose the one that suits you. The portal view is a simplified,
task-oriented starting screen: it presents common tasks (like going
online or opening a device) as large buttons, guiding you toward what
you want to do, which can help beginners. The project view is the full,
detailed interface described above, with the tree, work area, and
inspector, giving complete access to everything. Most technicians, once
comfortable, work in the project view, because it gives direct access to
the tree and everything in it, which is more efficient for navigation
and diagnosis. Understanding the two views — the simplified
task-oriented portal view and the full project view — lets you choose,
and understand which you are in. It reinforces that the project view,
with its tree and full access, is where the real maintenance work
happens, while the portal view is a simplified starting point.
Understanding the distinction — and that you will mostly use the project
view for its direct access to everything — helps you navigate TIA
Portal’s entry, choosing the full project view for the direct navigation
that maintenance work needs, so that you are not confused by the two
views but understand each and work in the project view where the tree,
work area, and inspector give you the full access that monitoring and
diagnosis require.
Finding your way around
Beyond the fixed layout, a few navigation habits make finding your
way around TIA Portal efficient, and understanding them speeds all your
work. The project tree is the primary navigation tool: expanding and
collapsing its branches lets you drill down to any element, and this is
how you reach a program block, a tag table, or the diagnostics.
Double-clicking an item in the tree opens it in the work area. The tabs
along the top of the work area let you switch between open items.
Right-clicking almost anything offers a context menu of relevant actions
(a very useful habit, as many functions — like cross-references — are
reached this way). And a search function helps find things by name.
Understanding these navigation habits — the tree to drill down,
double-click to open, tabs to switch, right-click for actions, search to
find — makes navigating TIA Portal efficient. It reinforces that finding
your way around is a matter of a few habits: using the tree to navigate,
opening items into the work area, switching between them with tabs, and
right-clicking for context actions. Understanding these habits equips
you to move efficiently around TIA Portal — reaching any block, tag, or
tool you need — which is the practical navigation skill that makes all
the subsequent monitoring and diagnosis efficient, because you can
quickly find and open whatever the task requires through the tree, the
work area tabs, and the context menus that give access to TIA Portal’s
functions.
The inspector window in depth
The inspector window, along the bottom of the interface, deserves a
closer look, because it is where much diagnostic detail appears. The
inspector shows information about whatever is currently selected,
organized into tabs: Properties (the settings and configuration of the
selected item), Info (general information, including compilation results
and cross-reference information), and Diagnostics (the health and
diagnostic status when online). So when you select a module, a block, a
tag, or another item, the inspector shows its details in these tabs —
and for diagnosis, the Diagnostics tab is particularly valuable, showing
the online status and any faults of the selected item. Learning to use
the inspector — selecting an item and reading its tabs — gives you
access to the detailed information behind what you see in the tree and
work area. Understanding the inspector window in depth — its Properties,
Info, and Diagnostics tabs showing the selected item’s details — equips
you to find the detailed information you need. It reinforces that the
inspector is where you read the details of selected items, with the
Diagnostics tab especially useful when online, so that selecting an item
and reading its inspector tabs is a key way to get detailed information.
Understanding the inspector window — the detailed information panel with
its tabs — completes your grasp of the interface, giving you the tool
for reading the details behind any selected item, which complements the
tree (navigation) and work area (viewing) with the detailed information
that Properties, Info, and especially Diagnostics provide about whatever
you have selected.
Scenario: finding the right logic fast
A scenario shows navigation skill paying off. A technician needed to
find the logic controlling a specific conveyor motor that would not
start, in a large program with many blocks. Rather than scrolling
aimlessly, they used the interface efficiently: they found the motor’s
output tag in the PLC tag table (searching for it), then used
cross-references to jump straight to where that tag was used in the
logic — landing directly on the relevant network. In moments, navigation
had taken them from a symptom (the motor) to the exact logic, ready to
monitor it. Good navigation — the tag table and cross-references —
turned a potentially long search into a quick jump to the right place.
This scenario shows interface navigation skill making diagnosis
efficient: using the tag table and cross-references to go straight from
the symptom to the relevant logic. Understanding how to navigate — the
tree, the tag table, cross-references — let the technician find the
right logic fast, rather than scrolling through a large program. It
reinforces that navigation skill is practically valuable, letting you
reach the relevant logic quickly via the tag table and cross-references.
The scenario reinforces the value of mastering navigation: the
technician found the exact logic for a specific motor in a large program
quickly by using the tag table and cross-references, which is the
efficient navigation that turns the interface from an overwhelming
expanse into a tool for quickly reaching exactly the logic a diagnosis
needs.
Customizing the workspace
A practical technique that makes working in TIA Portal more
comfortable is customizing the workspace to suit your task, and
understanding the flexibility helps you work efficiently. TIA Portal’s
windows and panels can be arranged to suit your needs: you can resize
the panels (making the editor larger to see more logic, or the tree
wider to see long names), float or dock windows, and open multiple
editors. For monitoring, you might maximize the editor to see more of
the logic at once; for navigation, you might widen the tree. You can
also detach windows to a second monitor if you have one, seeing the
logic and a watch table simultaneously. This flexibility lets you set up
the workspace for the task at hand. Understanding that you can customize
the workspace — arranging panels and windows to suit your task — helps
you work comfortably and efficiently. Understanding how to customize the
workspace — resizing, arranging, and detaching panels to suit your task
— makes working in TIA Portal more comfortable and efficient, letting
you set up the interface for what you are doing (more editor space for
monitoring, a wider tree for navigation, multiple windows across
monitors), so that the interface adapts to your work rather than
constraining it, which is a small but real productivity gain when you
spend time working in TIA Portal on maintenance tasks that benefit from
a well-arranged workspace.
Navigation as the foundation
Consolidating the interface material, it is worth emphasizing that
navigation is the foundation on which all TIA Portal maintenance skills
rest, because everything you do requires first navigating to the right
place. Whether you are monitoring logic, reading the diagnostics buffer,
checking device status, or examining tags, you must first navigate to
the relevant part of the project — via the tree, the tabs, the search,
or the context menus. So the navigation skills — knowing the layout,
using the tree, opening items, switching between them, right-clicking
for actions — underlie everything else. A technician fluent in
navigation can quickly reach whatever a task requires; one who struggles
to navigate is slowed in everything. So investing in navigation fluency
pays off across all tasks. Understanding navigation as the foundation —
underlying all the other skills — emphasizes its importance and the
value of fluency in it. Understanding that navigation is the foundation
of all TIA Portal maintenance skills — because every task requires first
navigating to the right place — emphasizes the value of navigation
fluency, so that mastering the interface layout, the tree, the tabs, the
search, and the context menus pays off across everything you do in TIA
Portal, since monitoring, diagnosing, reading, and every other task
begins with navigating to the relevant part of the project, making
navigation fluency the foundational skill that speeds and enables all
the maintenance work built upon it.