The practical payoff of reading schematics is troubleshooting — using the drawing to find a fault quickly and confidently. Everything the book has built toward comes together here in a method for going from a drawing and a symptom to the fault, systematically and efficiently.
The method
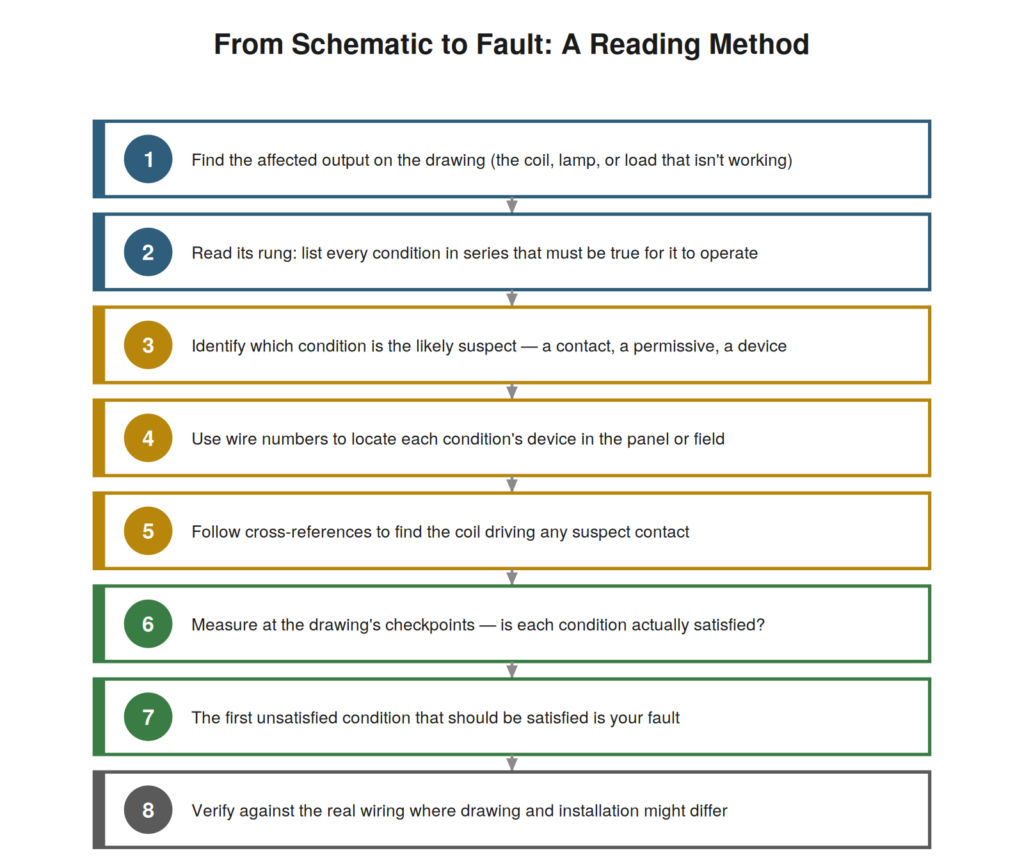
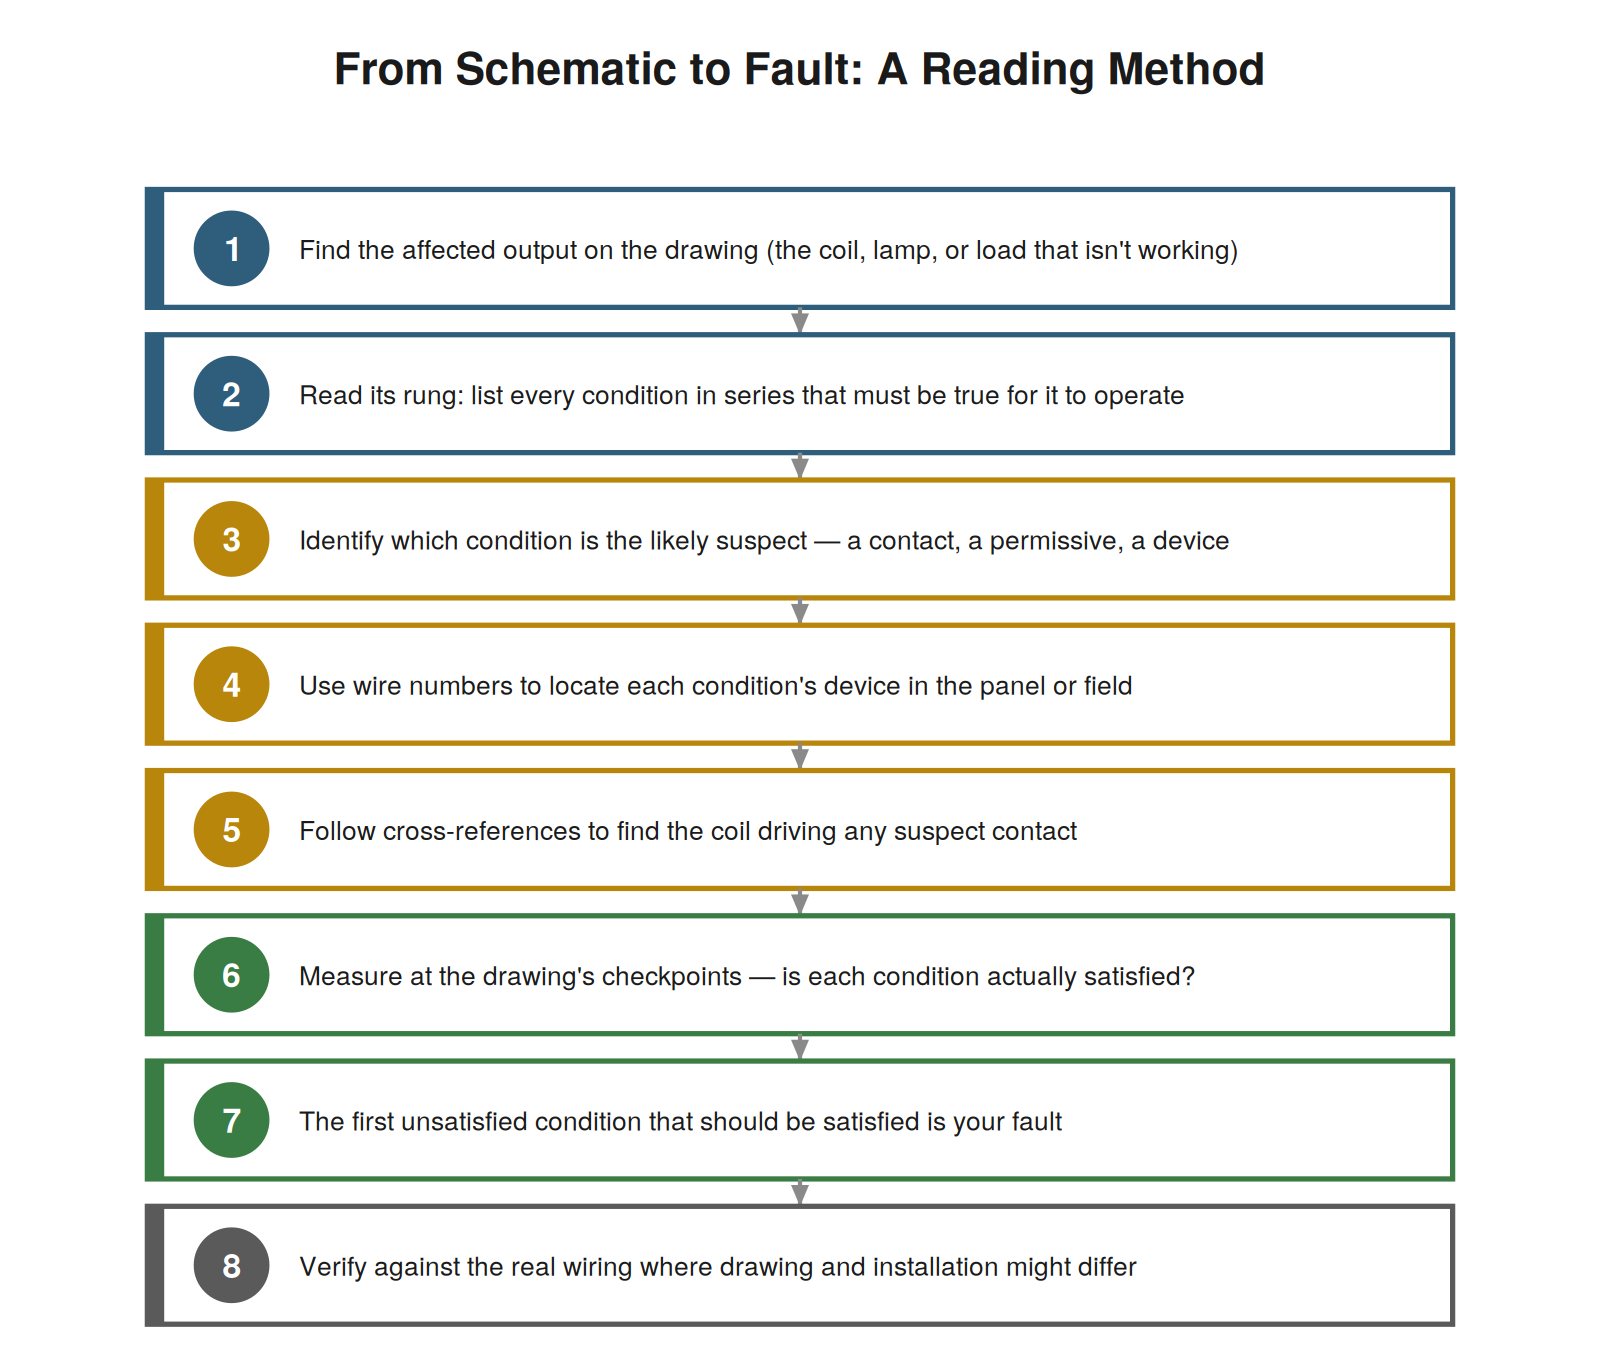
The method starts at the symptom and uses the drawing to converge on the fault. First, find the affected output on the drawing — the coil, lamp, or load that is not doing what it should. Second, read its rung and list every condition in series that must be satisfied for it to operate. Third, identify which condition is the likely suspect, using your understanding of the circuit and the symptom. Fourth, use wire numbers to locate each condition’s device physically, in the panel or field. Fifth, follow cross-references to find the coil driving any suspect contact, so you can check what controls it. Sixth, measure at the drawing’s checkpoints — is each condition actually satisfied? Seventh, the first condition that should be satisfied but is not is your fault. This method turns the drawing into a systematic path from symptom to cause, and it works because the drawing tells you exactly what conditions the failed output depends on and where to find each one.
Why reading makes troubleshooting fast
The reason a drawing-reader troubleshoots so much faster is that the drawing eliminates guessing. Without the drawing, the failed output could depend on anything, and you check possibilities more or less at random; with the drawing, you know precisely which conditions the output depends on, so you check only those, and you check them in a sensible order. The drawing narrows a vast space of possible faults to the specific set of conditions the failed output requires, and then each measurement either confirms a condition is met (eliminating it) or reveals one is not (finding the fault). This is why reading beats looking: the drawing converts troubleshooting from a search through everything into a directed check of exactly the relevant conditions. The whole skill of reading schematics pays off in this moment, when the drawing turns a mysterious fault into a short list of conditions to verify, and the reading tells you what each should be and where to check it.
A worked troubleshooting read
Consider the worked circuit with a symptom: the motor will not start. Reading the drawing, the motor’s contactor coil M (rung 2) depends on the Stop contact being closed, the Start contact making, the seal-in or Start providing a path, and the overload contact being closed. Going through these: is the overload tripped (its NC contact open)? A tripped overload is a common cause and easy to check first. Is the Stop contact actually closing? Is the Start button making contact when pressed? Using wire numbers, each of these is located and checked. Suppose the overload is found tripped — the fault is localized, and the next question is why it tripped, but the drawing has led you straight to it. Had the overload been fine, you would continue through the conditions until finding the one not satisfied. This is reading-based troubleshooting in action: the drawing named the conditions, and checking them in order found the fault, quickly and without guessing.
Measuring at the drawing’s checkpoints
The step in the troubleshooting method where reading meets the meter is measuring at the drawing’s checkpoints, and doing it well is what confirms or eliminates each condition. The drawing tells you what each condition should be — this contact closed, this point energized, this signal present — and the measurement tells you what it actually is. A checkpoint is a place where you can measure to test whether a condition is satisfied: across a contact to see if it is passing, at a node to see if it is energized, at a terminal to see if a signal is present. Reading the drawing identifies these checkpoints and what each should read; measuring reveals whether reality matches. The first checkpoint where reality fails to match what the drawing says should be true — a contact that should be closed reading open, a point that should be energized reading dead — is the fault or points directly to it. This disciplined comparison of drawing-predicted values against measured reality, checkpoint by checkpoint, is how the reading-based method converges reliably on the fault.
When the drawing does not lead to the fault
Honesty requires acknowledging that reading the drawing does not always lead straight to the fault, and knowing what to do when it does not is part of the skill. Sometimes every condition the drawing names checks out as satisfied, yet the output still does not work — which means either the fault is in something the drawing does not fully show (a marginal component, an intermittent connection, the output device itself), or the drawing does not match the installation. When this happens, the drawing has still done its job by eliminating the conditions it names, narrowing the fault to what remains: the output device, the wiring the drawing shows as simple connections, or a discrepancy between drawing and reality. The reading-based method converges on the fault by elimination even when the fault is not one of the named conditions, because it confirms those conditions are met and thus points to what is left. And when the drawing seems to lead nowhere, that itself suggests checking whether the drawing matches the installation — the subject of the final chapter. Reading the drawing is powerful even in the hard cases, where it narrows the search and flags the possibility of an outdated drawing.
Combining reading with systematic testing
Reading the drawing and systematic testing combine into the complete troubleshooting method, each supporting the other. Reading identifies the conditions the fault must involve and the checkpoints to test; testing measures reality at those checkpoints; and the two together converge on the fault. Reading without testing is hypothesis without confirmation — you know what conditions matter but not which is unmet; testing without reading is measurement without direction — you gather data but do not know where to look or what it means. Combined, reading directs testing to the right places and interprets its results, while testing confirms or refutes what reading predicts. The method flows between them: read to identify conditions and checkpoints, test to find which condition is unmet, read to understand what that unmet condition implies, test further if needed, until the fault is confirmed. This interplay of reading and testing is efficient troubleshooting, and it is why reading is not a substitute for testing but its essential partner — reading gives testing direction and meaning, testing gives reading confirmation and ground truth, and together they find faults far faster than either could alone.
Documenting what you find
Completing a troubleshooting job well includes documenting what you found, and reading the drawing supports this documentation that helps the next person. When you find and fix a fault, noting what it was, where, and how you found it — ideally referenced to the drawing — creates a record that speeds future troubleshooting of similar faults. If the fault revealed a discrepancy between drawing and installation, marking up the drawing corrects it for the future. If the fault is recurring, documenting the pattern helps identify a root cause. Reading the drawing lets you document precisely — referencing the specific circuit, device, or point involved — rather than vaguely, and precise documentation is far more useful later. This closing of the loop, from reading and troubleshooting to documenting the result, contributes to the accumulated knowledge of the equipment, making each fault a lesson recorded rather than a struggle repeated. The reading skills that found the fault also let you document it precisely, and doing so is part of professional troubleshooting — not just fixing the fault but recording it, corrected against the drawing, so the operation’s knowledge grows and the next person benefits from what you learned.
Case: a full troubleshooting sequence
To see the complete method in action, follow a full sequence. A conveyor motor would not start. Step one, find the output: the motor’s contactor coil on the control drawing. Step two, read its conditions: a normally-closed stop, a normally-open start with seal-in, a normally-closed overload contact, and a permissive from a guard switch. Step three, identify a suspect: the guard permissive, since the machine had recently had guard work. Step four, use wire numbers to locate the guard switch and its wiring. Step five, check the conditions: stop closed (good), overload not tripped (good), guard switch — found not closed, its contact open. The guard switch, disturbed by the recent work, was not making its contact, so the permissive was unmet and the motor correctly would not start. Step six and seven: the unmet guard permissive was the fault, resolved by correcting the guard switch. The whole sequence — find the output, read its conditions, suspect one, locate it, check the conditions, find the unmet one — led from the symptom to the fault methodically. This case shows the complete reading-based troubleshooting method applied end to end, converging from ‘the motor will not start’ to ‘the guard switch is not making its permissive contact’ through the systematic steps, each guided by reading the drawing, arriving at the fault without guessing.
Troubleshooting as the ultimate application
Troubleshooting is the ultimate application of reading schematics, the purpose toward which the reading skill is most often directed, and excelling at it is the practical payoff of everything the book teaches. All the reading skills — symbols, connections, logic, patterns, navigation, integration — converge in troubleshooting, where reading the drawing to find a fault fast is the goal. The reader who has developed these skills and applies them to troubleshooting through the systematic method — find the output, read its conditions, locate and check them, find the unmet one — troubleshoots electrical faults efficiently, which is a highly valued capability in industry. This is where reading schematics proves its worth most tangibly: in the reduced downtime, the faults found in minutes rather than hours, the confidence before problems that others find baffling. Troubleshooting excellence is the reading skill applied to its most important use, and developing it — combining the reading skills with the systematic method and practice on real faults — is the practical culmination of learning to read schematics. The book teaches reading; troubleshooting is where reading pays off most, and the reader who masters reading and applies it systematically to faults gains the troubleshooting excellence that makes the whole skill so valuable. Reading schematics is worth learning above all because it makes you excellent at troubleshooting, which is the application that matters most in industrial electrical work.