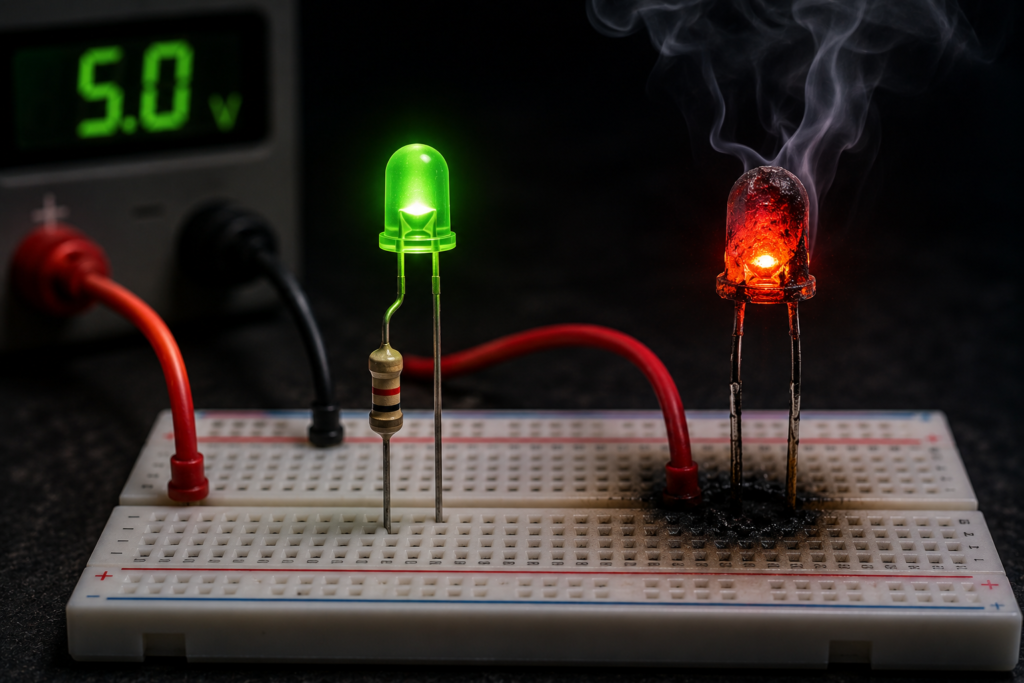
An LED looks harmless enough.
It has two tiny metal legs, uses very little electricity and may be smaller than your fingernail. Connect it to a battery and it lights up. Simple, right?
Well… sometimes a little too brightly.
Connect an ordinary LED directly to a power source without controlling the current, and it may flash brilliantly for a fraction of a second before becoming a permanently unlit piece of plastic. The LED did not “use what it needed.” It took more current than it could survive.
That is why LEDs are commonly connected with a resistor.
The resistor limits the current flowing through the LED, keeping it bright enough to see but low enough to prevent overheating and damage. It is a cheap component doing a surprisingly important job.
An LED Is Not Like a Normal Light Bulb
A traditional incandescent bulb contains a thin metal filament. That filament has electrical resistance, and its resistance increases significantly as it becomes hot. This behaviour naturally helps restrict the current.
An LED works differently.
LED stands for light-emitting diode. It is a semiconductor device that produces light when current flows through it in the correct direction. Like an ordinary diode, it allows current to pass mainly one way.
The unusual part is how the LED responds to voltage.
Below a certain voltage, almost no current flows and the LED remains dark. Once the voltage reaches the LED’s forward-voltage region, current can rise extremely quickly. A tiny additional increase in voltage may cause a much larger increase in current.
This is where people get caught out.
An LED does not behave like a neat, predictable resistor. Its resistance is not fixed. You cannot simply connect it to any power source with the “correct-looking” voltage and assume it will regulate itself.
It won’t.
Voltage Turns It On, but Current Can Destroy It
Every LED has an approximate forward voltage, often written as (V_f).
This is the voltage normally measured across the LED while it is conducting. The value depends partly on the colour and construction of the LED.
Typical approximate values are:
- Red LED: 1.8 to 2.2 volts
- Yellow or orange LED: 2.0 to 2.2 volts
- Green LED: around 2.0 to 3.2 volts
- Blue LED: 2.8 to 3.4 volts
- White LED: 2.8 to 3.4 volts
These are not exact universal numbers. Two LEDs from the same packet may have slightly different forward voltages. Temperature changes the value too.
Suppose a white LED has a forward voltage of about 3 volts. It might be tempting to connect it directly to a 3-volt power supply.
That can occasionally appear to work, especially with a small battery that has noticeable internal resistance. But it is unreliable. If the supply voltage is slightly higher than expected, the LED warms up or the particular LED has a lower forward voltage, the current may increase sharply.
More current creates more heat. More heat may reduce the forward voltage. A lower forward voltage can allow even more current to flow.
Round and round it goes.
This effect is sometimes called thermal runaway, and it can quickly damage the LED.
What the Resistor Actually Does
A resistor placed in series with an LED absorbs the part of the supply voltage that the LED does not need.
More importantly, it limits the current.
Imagine connecting a red LED with a forward voltage of 2 volts to a 5-volt supply. The LED uses approximately 2 volts, leaving about 3 volts across the resistor.
The resistor converts that excess electrical energy into a small amount of heat. Because its resistance is known, it also prevents the current from rising uncontrollably.
The basic resistor calculation is:
[
R = \frac{V_{supply}-V_f}{I}
]
Where:
- (R) is resistance in ohms
- (V_{supply}) is the power-supply voltage
- (V_f) is the LED’s forward voltage
- (I) is the desired LED current in amperes
For example, consider:
- Supply voltage: 5 V
- LED forward voltage: 2 V
- Desired current: 10 mA, or 0.01 A
The calculation becomes:
[
R = \frac{5-2}{0.01}
]
[
R = 300\ \Omega
]
A 300-ohm resistor would provide the calculated current. Since 300 ohms may not always be the most convenient standard value, you could choose the next higher common value, such as 330 ohms.
Using a slightly larger resistor reduces the current a little. The LED may be marginally dimmer, but it will generally operate more comfortably.
Honestly, most modern indicator LEDs are still clearly visible at currents well below their maximum rating. There is often no good reason to drive them as hard as possible.
What Happens Without a Resistor?
The result depends on the voltage source, the LED and the amount of current the source can provide.
Sometimes the LED dies immediately.
You may see a very bright flash, followed by darkness. Inside the LED, excessive current overheats and damages the semiconductor junction or the tiny internal connection wires.
In other situations, the LED continues working but runs far too hot. Its brightness may gradually decrease, its colour may shift or its operating life may become dramatically shorter.
An LED rated for tens of thousands of hours can fail remarkably quickly when abused. Seconds, sometimes.
A powerful regulated power supply is particularly unforgiving because it tries to maintain its set voltage while delivering whatever current the circuit demands, up to the supply’s limit. A small coin cell may be less dramatic because the battery’s internal resistance restricts the current—but relying on battery resistance is not proper current control.
And yes, online experiments sometimes show LEDs connected directly to coin cells. They may work for a demonstration. That does not mean the same approach is sensible with a USB supply, lithium battery or bench power source.
Different source. Different consequences.
A 5-Volt Supply Is Not Safe Just Because It Is “Low Voltage”
Low voltage can still destroy a small semiconductor component.
A typical LED may be designed to operate at around 5, 10 or 20 milliamps. A USB power supply can potentially provide hundreds or thousands of milliamps.
The LED will not necessarily draw the full rated current of the power supply, but the supply can provide far more current than the LED can safely tolerate. Without something limiting that current, the LED becomes the weakest part of the circuit.
This is a common beginner mistake:
“The adapter is rated for 2 amps, so won’t it force 2 amps through the LED?”
Not exactly. A power supply’s current rating tells you the maximum current it can provide while maintaining its rated voltage. The connected load determines how much current actually flows.
The problem is that an LED’s current can rise severely once its forward voltage is exceeded. A powerful supply has no trouble delivering that damaging current.
The resistor changes the behaviour of the entire circuit and gives the current a predictable limit.
How to Choose the Right Resistor
You need three basic values:
- The supply voltage
- The LED’s forward voltage
- The desired operating current
The forward voltage and maximum current are normally listed in the LED’s datasheet.
For a basic indicator LED, choosing an operating current between roughly 5 and 15 milliamps is often reasonable, depending on the component and required brightness. Some small LEDs are rated for 20 milliamps, but that is usually a maximum continuous figure rather than a target you must always reach.
Let’s try another example.
You have:
- A 12 V supply
- A white LED with a 3.2 V forward voltage
- A desired current of 10 mA
[
R = \frac{12-3.2}{0.01}
]
[
R = 880\ \Omega
]
You could use a standard 910-ohm resistor. A 1-kilohm resistor would also work and would reduce the current slightly.
The LED will probably still be bright enough. Human vision is not linear, so cutting the current does not necessarily make an LED look proportionally dimmer.
Do Not Forget the Resistor’s Power Rating
The resistor dissipates power as heat.
Its approximate power can be calculated using:
[
P = I^2R
]
Or:
[
P = (V_{supply}-V_f)I
]
Using the previous 12-volt example:
[
P = (12-3.2)\times0.01
]
[
P = 0.088\text{ W}
]
A common 0.25-watt resistor would handle this comfortably.
It is good practice not to run a resistor continuously at the absolute edge of its power rating. Some margin helps keep temperatures reasonable and improves reliability.
For ordinary indicator LEDs, quarter-watt resistors are often sufficient. Higher supply voltages or higher LED currents may require a resistor with a larger power rating.
A resistor that is too small physically may become extremely hot, even when its resistance value is mathematically correct.
Does the Resistor Go Before or After the LED?
In a simple series circuit, it does not matter.
The resistor may be connected between the positive supply and the LED, or between the LED and the negative side of the supply. The same current flows through every component in a series circuit.
These two arrangements are electrically equivalent:
[
Positive \rightarrow Resistor \rightarrow LED \rightarrow Negative
]
[
Positive \rightarrow LED \rightarrow Resistor \rightarrow Negative
]
People often place the resistor before the LED because the diagram feels easier to read. Electrically, though, the LED does not care which side the resistor is on.
Polarity does matter.
The LED’s anode must normally connect toward the positive side, while its cathode connects toward the negative side. On many through-hole LEDs, the longer lead is the anode and the shorter lead is the cathode. The flat edge on the LED body usually marks the cathode.
Can Several LEDs Share One Resistor?
Sometimes, but the circuit arrangement matters.
LEDs connected in series can usually share one current-limiting resistor because the same current flows through all of them. Their forward voltages are added together when calculating the resistor.
For example, three red LEDs with a forward voltage of 2 volts each require about 6 volts in total. With a 9-volt supply, approximately 3 volts remain for the resistor.
LEDs connected in parallel should generally not share one resistor.
Even supposedly identical LEDs can have slightly different forward voltages. The LED with the lowest forward voltage may draw more current, warm up and then draw even more. One LED ends up hogging current while the others receive less.
The safer arrangement is to give each parallel LED its own resistor.
It costs a few extra cents. Worth it.
Do All LEDs Need a Resistor?
Not necessarily.
An LED needs current control, but that control does not always have to come from a simple resistor.
Alternatives include:
- Constant-current LED drivers
- Current-regulator integrated circuits
- Transistor-based current sources
- Pulse-width-modulated driver circuits
- Power supplies specifically designed for LEDs
- Drivers built into LED lamps or modules
High-power LEDs should normally use proper constant-current drivers rather than basic resistors. Their operating current is higher, heat management is more demanding and small efficiency losses become important.
Some LED products already contain resistors or drivers. Examples may include certain 5-volt or 12-volt LED modules, prewired panel indicators and LED strips.
Adding another resistor without understanding the module may make it unnecessarily dim. Removing the built-in current control, on the other hand, may destroy it.
Always check what you are actually buying.
A bare LED and an LED module are not the same thing, even if the product photos look suspiciously similar.
Why LED Strips Can Connect Directly to 12 or 24 Volts
A standard 12-volt LED strip usually contains groups of LEDs and resistors already installed on the flexible circuit board.
For example, one segment may include three LEDs in series plus a resistor. The strip’s internal components divide the supply voltage and limit current for that section.
That is why the entire strip can be connected to its rated voltage without adding one external resistor for every LED.
Addressable LED strips are more complicated. Their pixels contain small control circuits, and they must be supplied with the correct regulated voltage. They may also require capacitors, signal resistors or other protective components depending on the design.
The important point is that the current-limiting function still exists somewhere. It has not magically disappeared. It is simply built into the product.
Why a Resistor Is Such a Good Beginner Solution
A resistor is not the most efficient LED driver in every situation, but it is difficult to beat for simplicity.
It is cheap, small, reliable and easy to calculate. For indicator lights, breadboard experiments, microcontroller outputs and other low-power circuits, it often does exactly what is needed.
No programming. No controller chip. No drama.
The resistor absorbs excess voltage and keeps the LED current within a sensible range. Without it—or another current-regulating device—the LED’s current depends too heavily on small changes in voltage, temperature and component characteristics.
That is a shaky way to design a circuit.
The Resistor Protects More Than the LED
In some circuits, uncontrolled LED current may also damage the component driving it.
A microcontroller pin, logic output, sensor output or transistor has its own current limits. Connecting an LED directly to an output pin may overload both the LED and the electronic device supplying it.
The resistor protects the output by restricting how much current leaves the pin.
This is especially important with boards such as Arduino, ESP32, Raspberry Pi Pico and similar controllers. Their output pins are intended for small currents. A pin may survive a careless connection once or twice, but repeated overcurrent can cause permanent damage.
Sometimes the LED fails first.
Sometimes the microcontroller does.
Neither outcome is especially satisfying.
A Small Component With an Important Job
An LED needs controlled current because its current does not rise gently and predictably with voltage.
Once the LED begins conducting, a small voltage change can produce a large current increase. That excess current creates heat, shortens the LED’s life and may destroy it almost instantly.
A series resistor provides a straightforward solution. It drops the unused voltage and sets the current at a safer level.
So, does every LED literally need a resistor? No. Constant-current drivers and built-in control circuits can perform the same job more effectively in certain applications.
But every LED needs some form of current limiting.
Without it, that bright little light may be very bright indeed—briefly.